Gardening · Quilting / Sewing Tutorials · Uncategorized

Well It’s October…..

What happened between the last post and now.. summer tourism! I was not expecting it to be as crazy busy this year as it ended up being, but its all good. Now back to being able to sew things that are not urgent! I will catch up on a few things but for now here is a quick fun block I love to make.

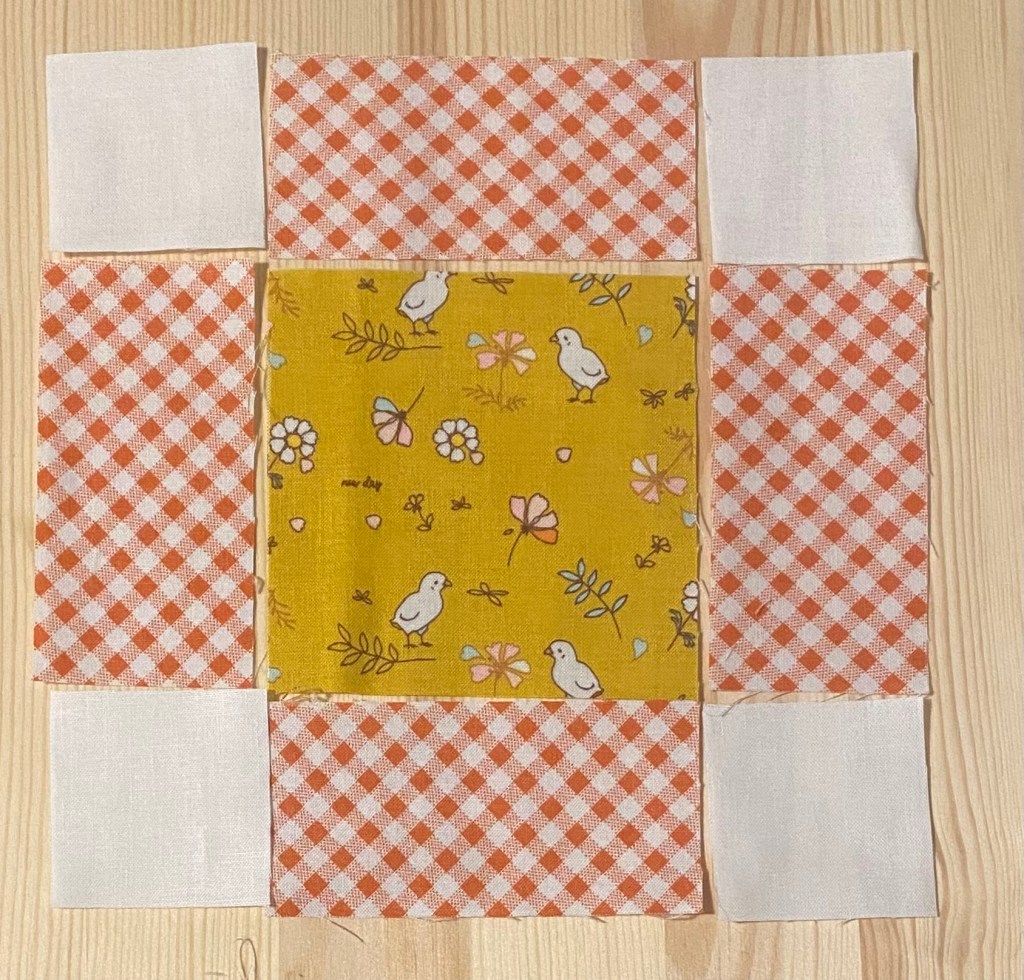
The one I am currently making is made up of a 4 inch center square, (4) 2×4 inch sides and (4) 2 inch corner squares in off white. The finished block is 7 inches.

Material used is 10 Fat Quarters of Hidden Cottage by Minki Kim, you will have extras left over for something else. I used Confetti Cotton in Off White, I am working from a yard cut I have, so facture in a yard.

Side Note: I also like to make theses with 3.5 inch centers, 1.5 x 3.5 sides & 1.5 inch corner squares. I may do a post on the other quilt I have on the go using this size.

I try to make them scrappy, I cut (30) 4 inch centers, 3 from each fat quarter. Then cut all the side pieces.

From the off white I cut 2 inch strips, then sub cut into 2 inch blocks.

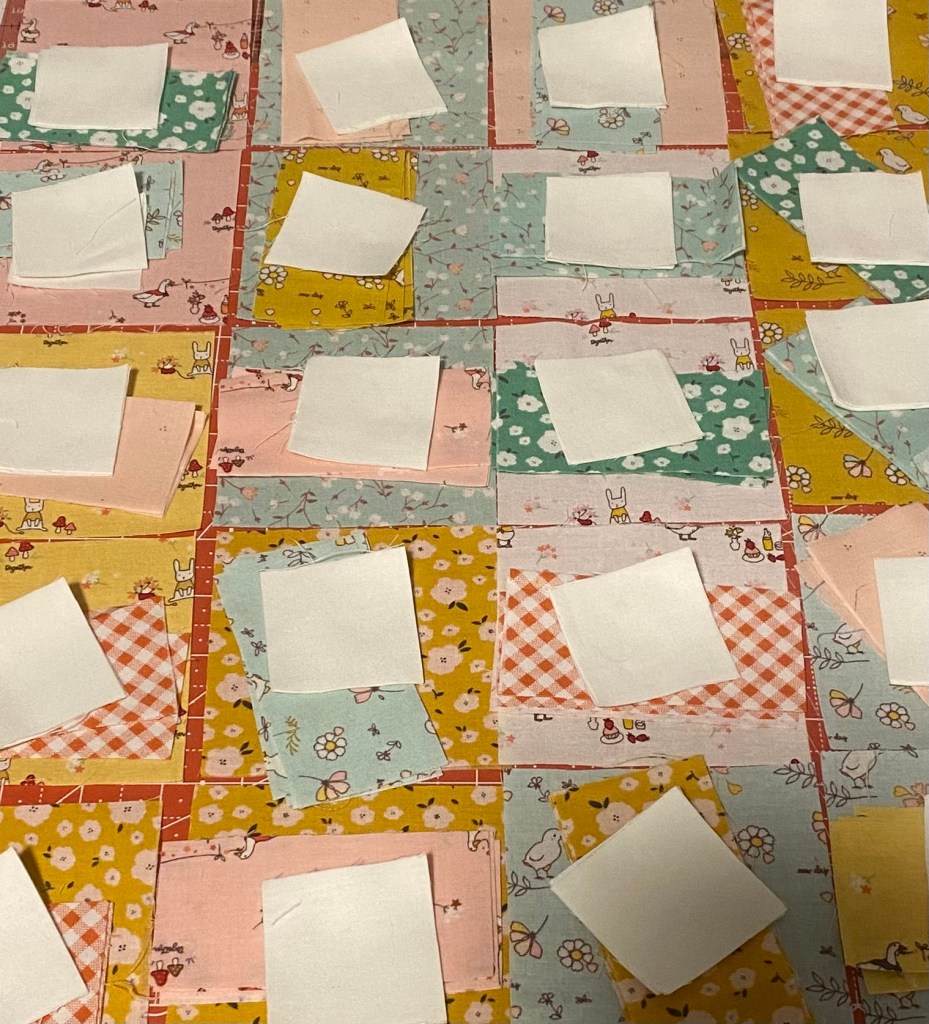
I like to lay out all the inner squares, put sides on top then the 4 2 inch squares each block requires. They are then ready to sew.

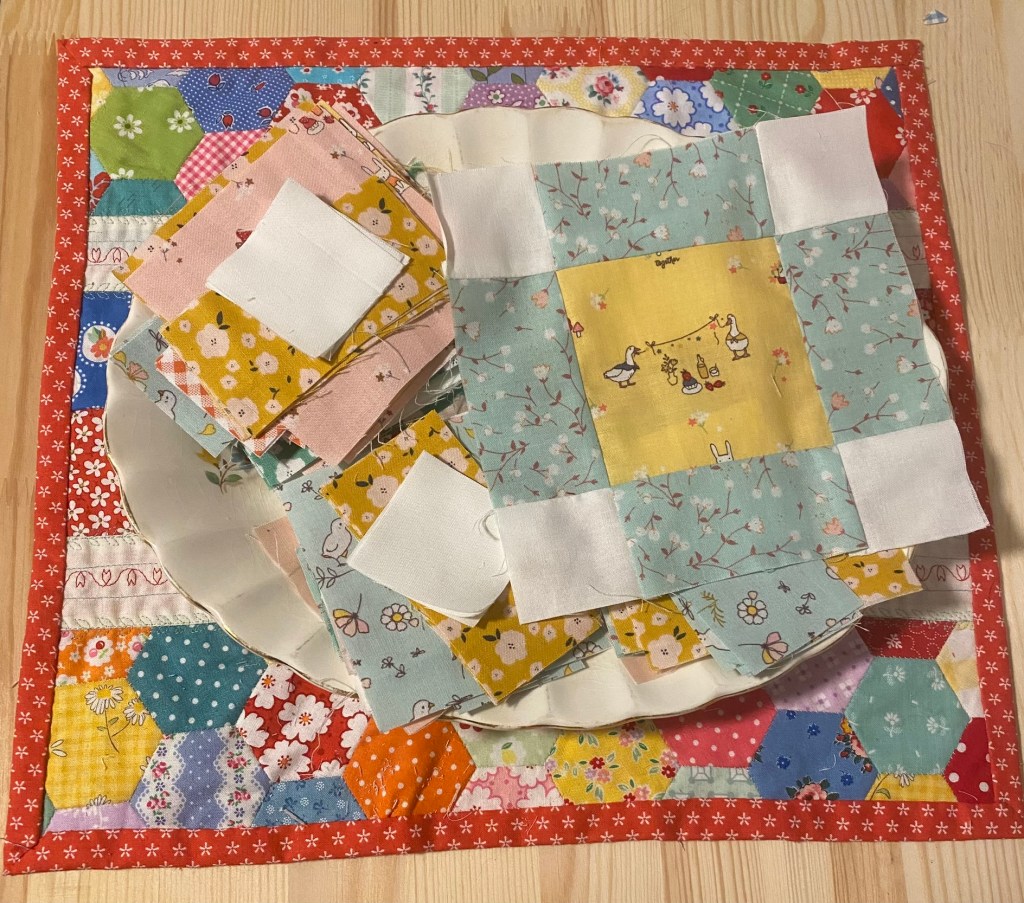
I like to stack mine on a vintage plate, you can use anything, I just really like vintage china and try to use them in weird ways. Sew together & iron.

Lay them out somewhere and play around until you like how it looks. This quilt will be 5 block across, 6 rows total. Stack them how ever your brain likes to do that and sew into rows using 2 inch x 7 inch strips in the off white in between the blocks.

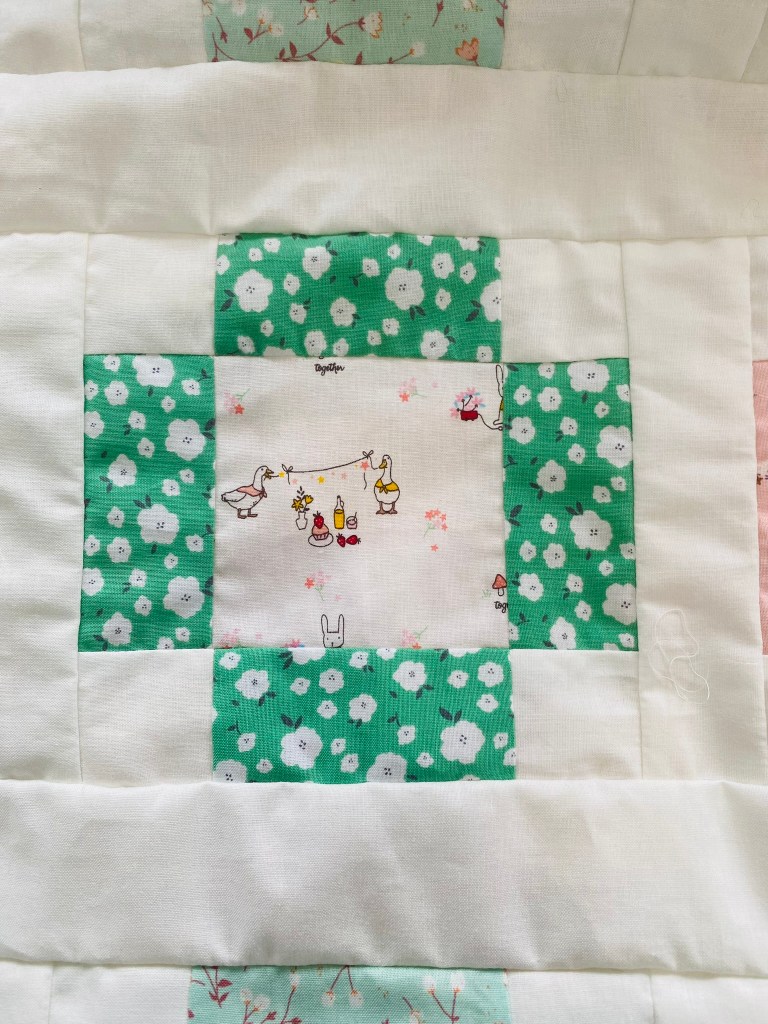
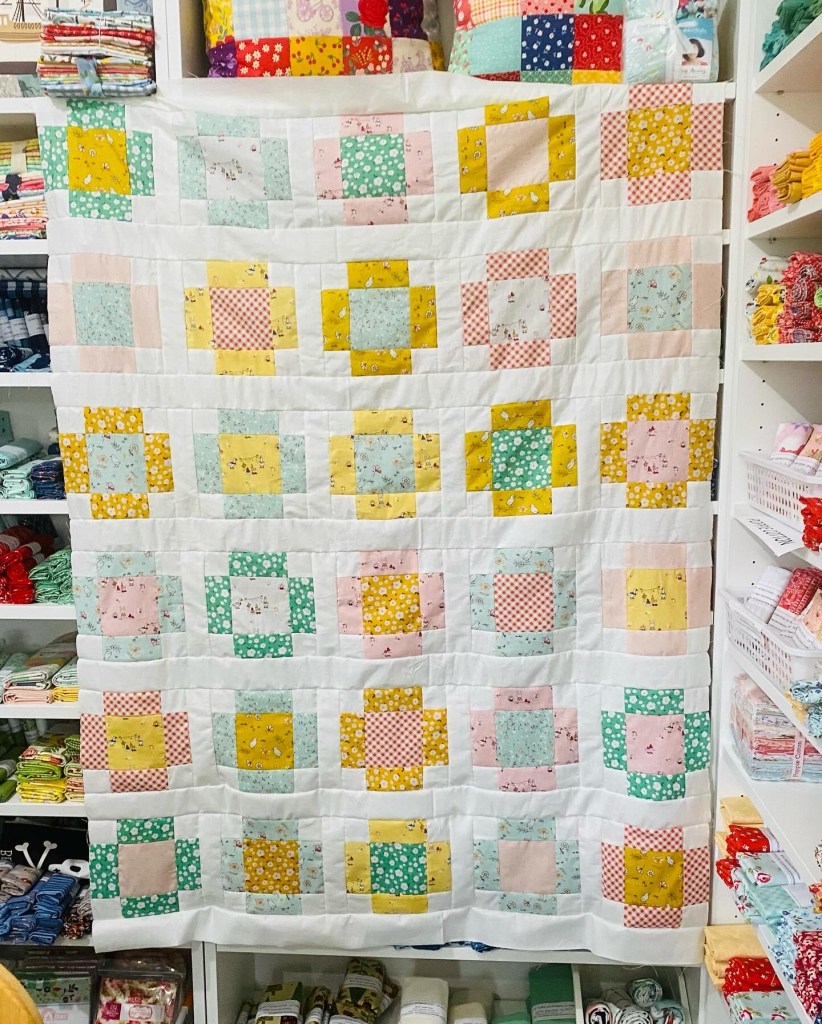
I used 2.5 inch strips in the off white as my boarders on all sides, added on after this picture was taken. Cute & Quick .. now into the to be quilted pile it goes!

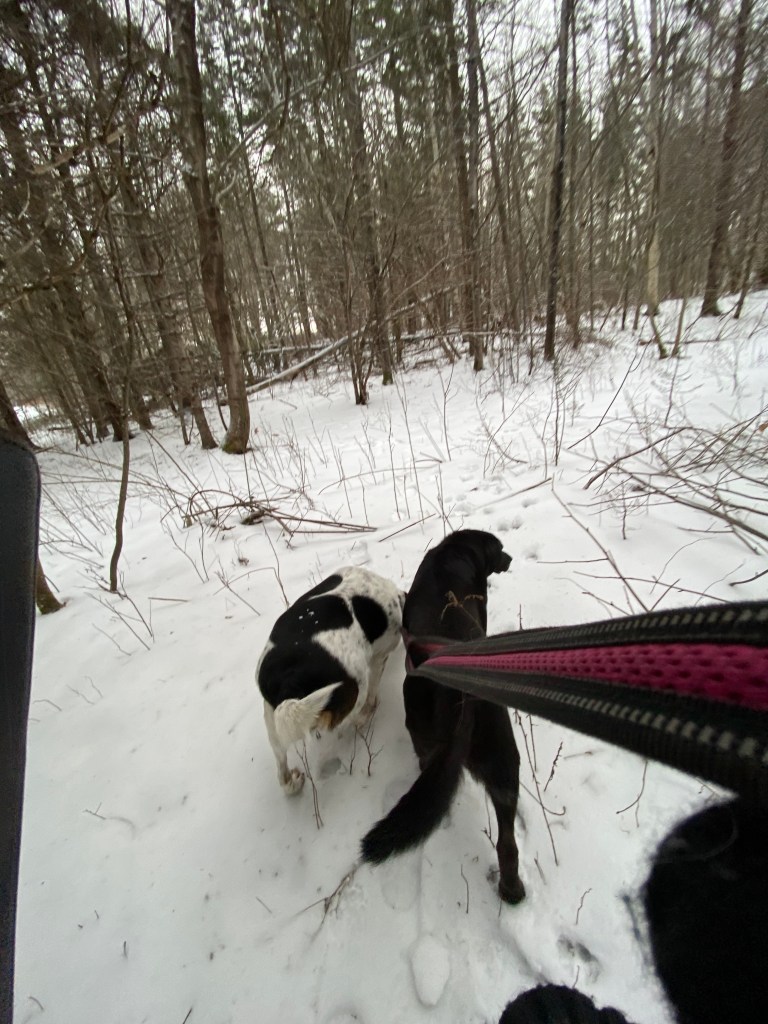
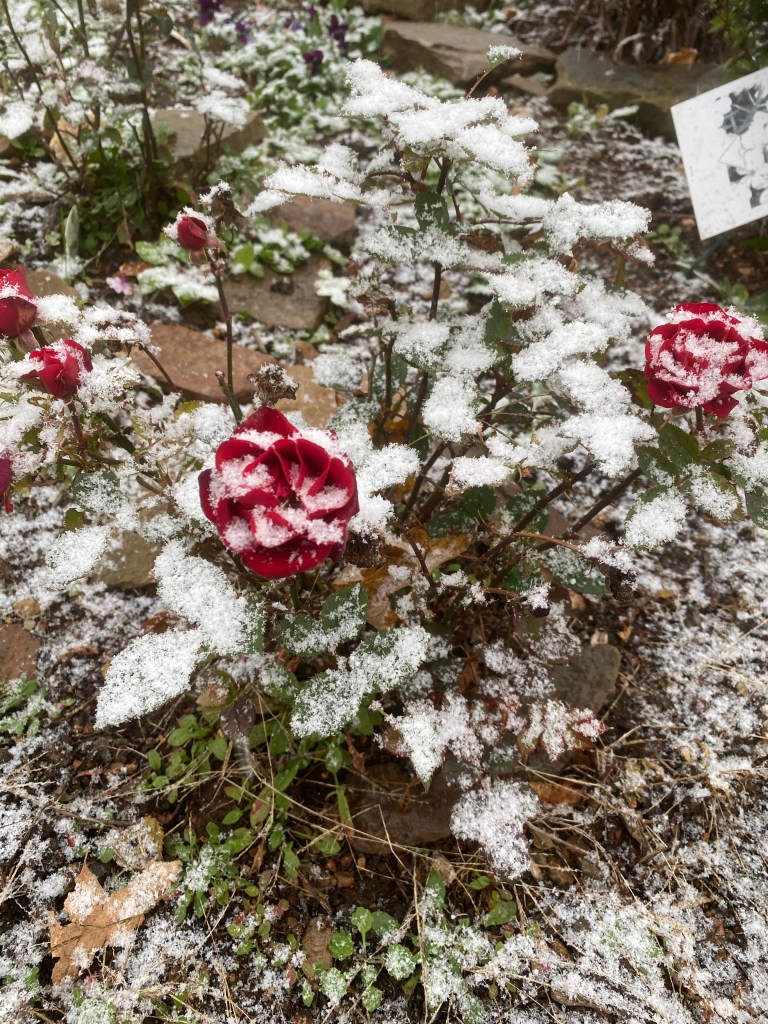
What else has been going on? SNOW! Too early.. I am not a winter person. The flowers are still blooming, they were not expecting snow either. I managed to get all the dahlias dug up and in before it hit. Here’s a few frosty flower pictures.. poor roses!

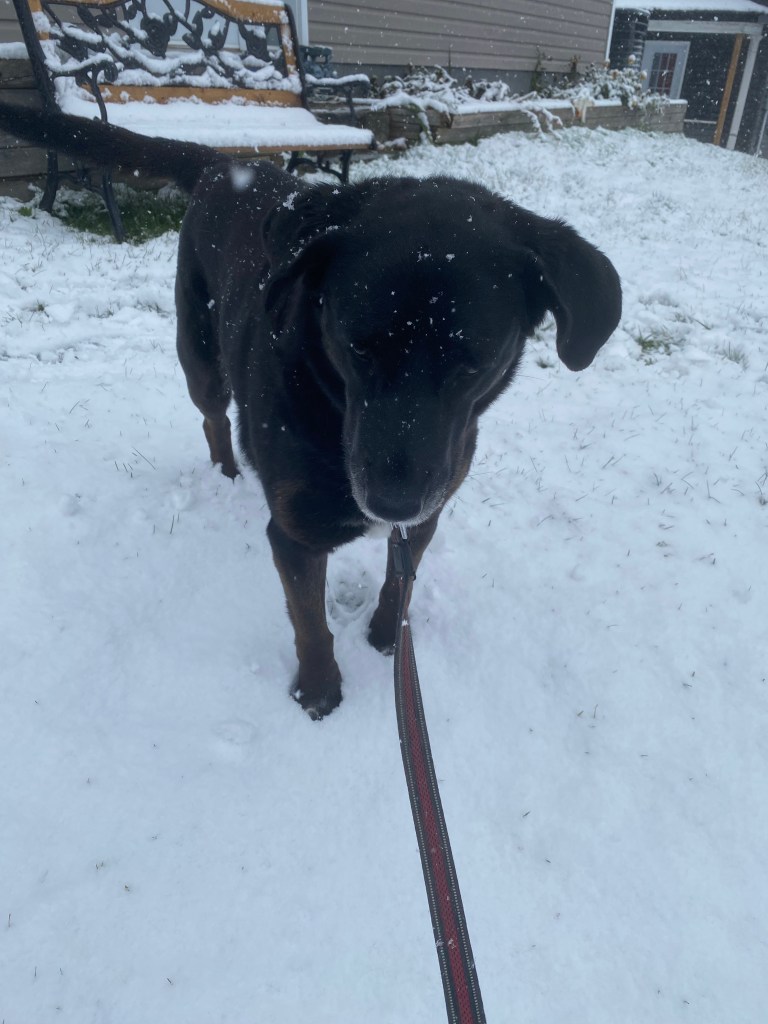
Scouse on the other hand was very happy to see the snow. She LOVES it..

Its Nov now .. I will get another post ready. Hopefully wont be as long in between as the summer ones here .. That was a crazy summer!

Crochet Projects · Gardening

Crochet Bunting & A Winter Walk

Now that Christmas is over, I like to turn my house from winter season to brighter, happier spring decor. It helps to chase the January blues and gives colour to the bleak days and still dark -to- early evenings.

I made this simple granny triangle bunting last year about this time and have it hanging in the studio room. The summer colours make me smile. I used Lori Holts chunky thread, the cotton gives good structure and the colours are bright.

I carry 31 shades in the shop, available here

I used a 4mm hook and shades: Cloud, Beehive, Aqua, Denim, Green, Red and Peony Pink

Pink:

Chain 5, join

Round 1:  Join in yarn. Chain 3 (counts as first DC), 3DC, Ch3, 4 DC, Ch3, 4DC, Ch3. Join in top of Chain 3 in the first set.

Red

Round 2:  Join in yarn. Chain 3 (counts as first DC), 3DC, Ch3, 4 DC. First corner made. Ch1 (4DC, Ch3, 4DC, Ch1) x2. Join in top of Chain 3 in the first set.

Green

Round 3:  Join in yarn. Chain 3 (counts as first DC), 3DC, Ch3, 4 DC, Ch1, (4DC, Ch1, 4DC, Ch3, 4DC, Ch1) x2. Join in top of Chain 3 in the first set.

Cloud

Round 4: Join in yarn. Chain 3 (counts as first DC), 3DC, Ch3, 4 DC, Ch1, (4DC, Ch1, 4DC, Ch1, 4DC, Ch3, 4DC, Ch1) x2. Join in top of Chain 3 in the first set.

Choose one: Denim, Red, Aqua, Beehive, Green, Pink.

Round 5: Join in yarn. Chain 3 (counts as first DC), 3DC, Ch3, 4 DC, Ch1, (4DC, Ch1, 4DC, Ch1, 4DC, Ch1, 4DC, Ch3, 4DC, Ch1) x2. Join in top of Chain 3 in the first set.

Finished.

Make as many as you like.

For a solid colour triangle, turn work at the end of each round instead of cutting and starting new yarn.

To connect bunting flags, chain stitch and join the flags along the top, leaving desired length of chain stitches at beginning, between the flags and end.

Flowers:

Around the house I love to have flowers. Winter is the perfect time for classic Amaryllis. They are so easy to grow and those giant blooms are a wonderful sight! How to keep them after they bloom?

Cut the flower stalk once the flowers are finished. Keep it going in the pot and let the leaves bring some greenery into your house. Keep watering until the spring and plant in the garden after frost. The leaves usually get really tall. Once they start to die off in the fall cut down to the they way they came to you in their box. Clean the roots and bulb. Put back in their box for 8 weeks then start all over again.

Orchids are another great flowering plant to have around. They come in so many colours! I have mine in the North facing windows and they love it. You need to move them around a bit to find out where they are happy. To water I take them to the sink, take them out of the ceramic pot. Using a measuring cup poor water through the clear plastic pot they come in, making sure not to wet the leaves or base of the plant, you only want the roots to get the water. Flush a few times, drip dry and put back in their pot. Orchids are like air plants and the roots will love the water, but do not like to sit in it.

I took Scouse and Ella for an adventure today. We don’t normally go into the woods, there are no trails and it can be quite dense in the summer, but its not summer! The snow is not very deep, there are no ticks, no long grass, just some trees and branches to navigate. They loved exploring and had a good time smelling everything. They we had to head home so I could get to the shop.

Back home we went, but Scouse had to have her few minutes of sitting and watching the world go by. With a pretty view like that, its easy to see why she loves it.

Happy Stitching!