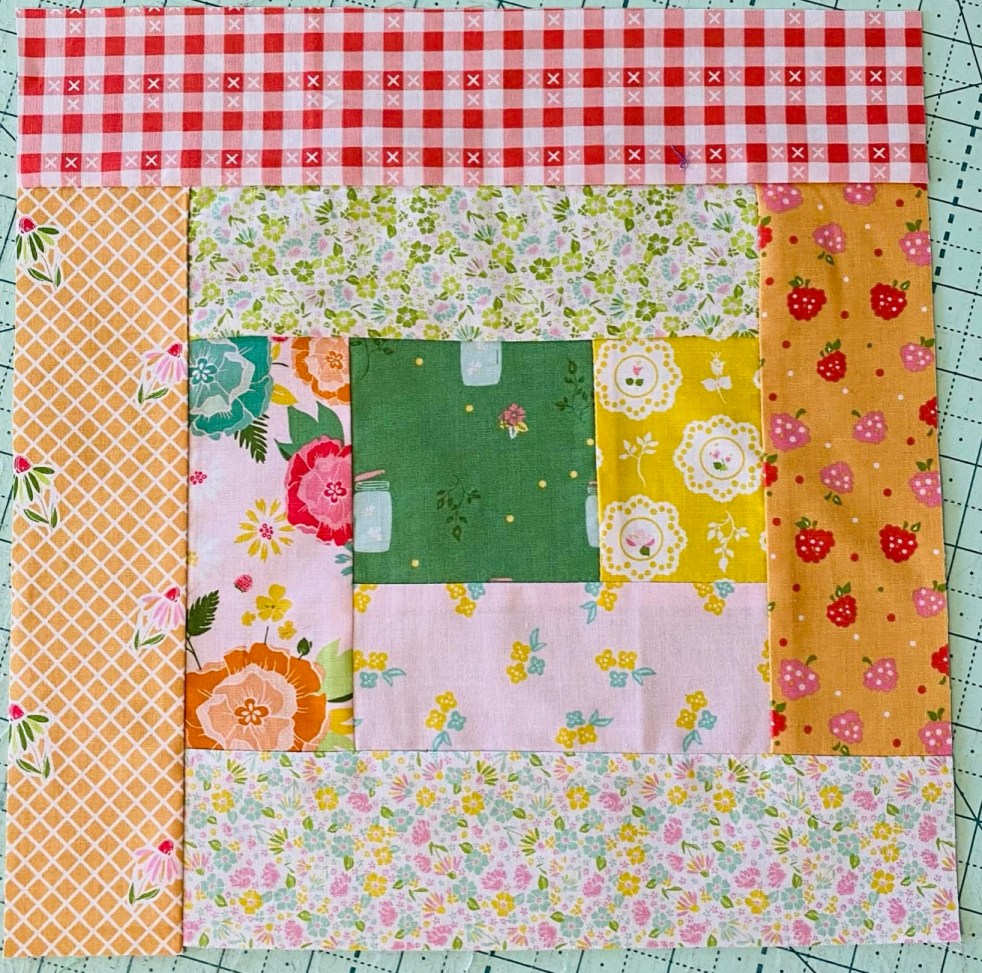
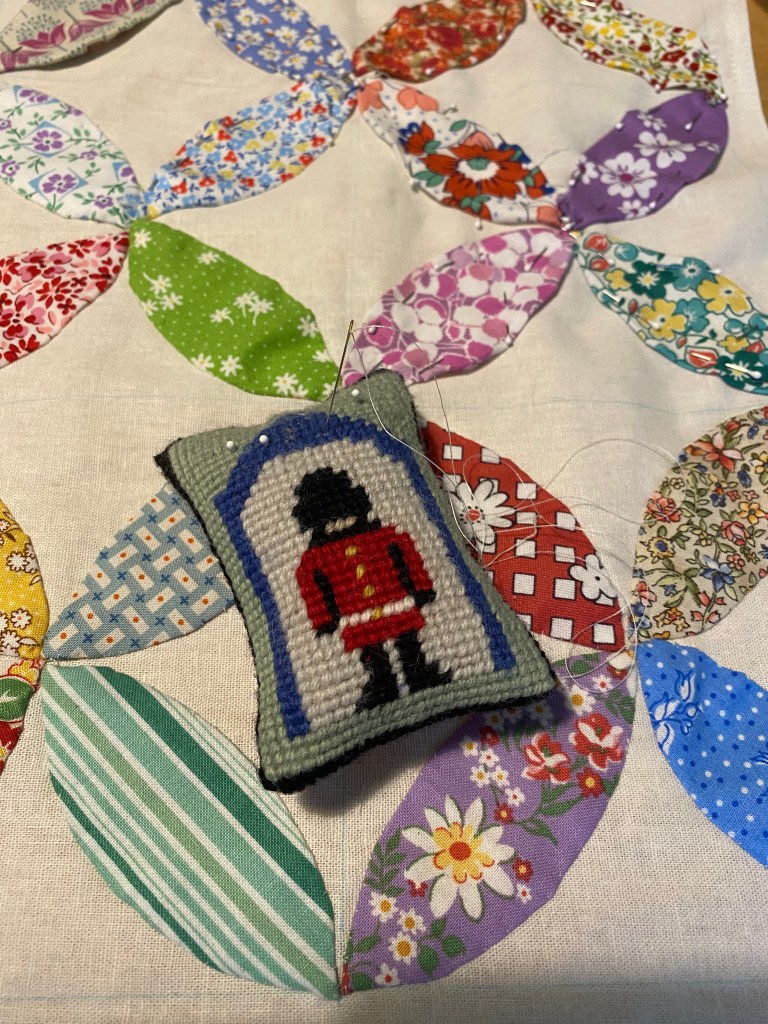
Log cabin blocks are very versatile and y to play with. They start with a centre and work around the centre with strips. You can start on the top, side or bottom, you can use the same width strips or strips of different widths. This one is a pretty standard.
Before you ask why the letters for the strips are not in order, the program I use sets the letters, not me..
F: 3.5 inch square
D: 2.5 x 3.5 strip
E: 2.5 x 5.5 inch strip (need 2)
B: 2.5 x 7.5 inch strip (need 2)
C: 2.5 x 9.5 inch strip (need 2)
A: 2.5 x 11.5 inch strip
Sew D onto F
Sew E to the bottom
Sew E to the side
Sew B to the top
Sew B to the side
Sew C to the bottom
Sew C to the side
Sew A on the top
Finished.
You can keep going and make it bigger if you would like.
Make sure to iron after sewing each strip and use a 1/4 inch foot.
Have fun making these into quilts, pillows, pot holders etc.
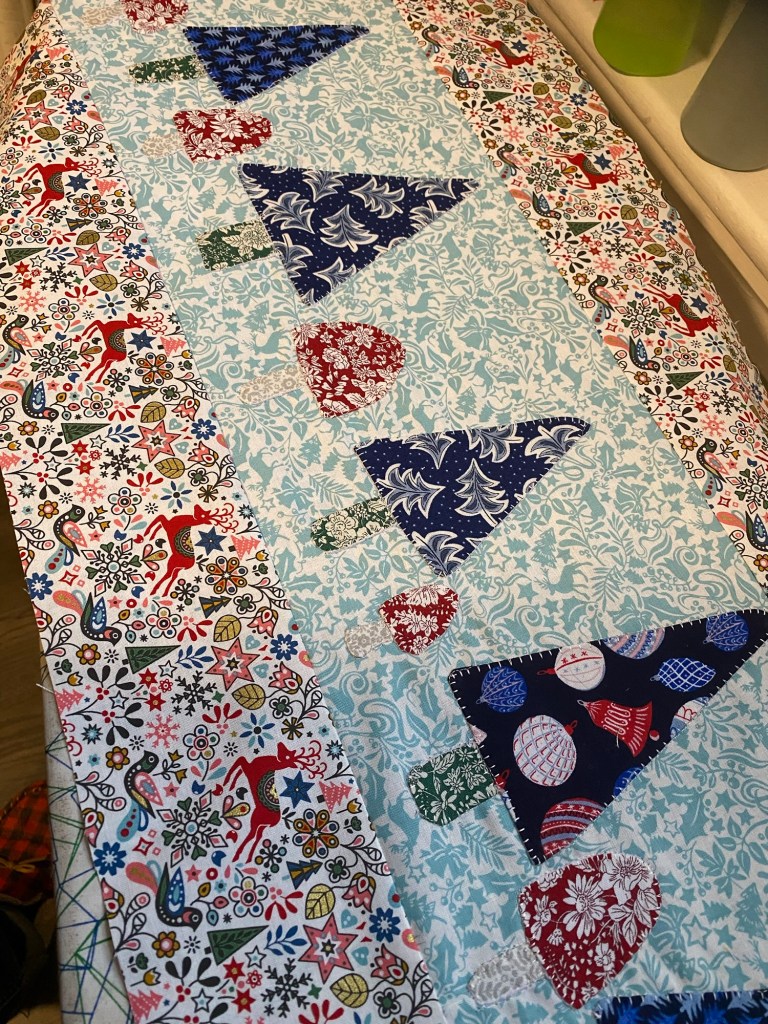
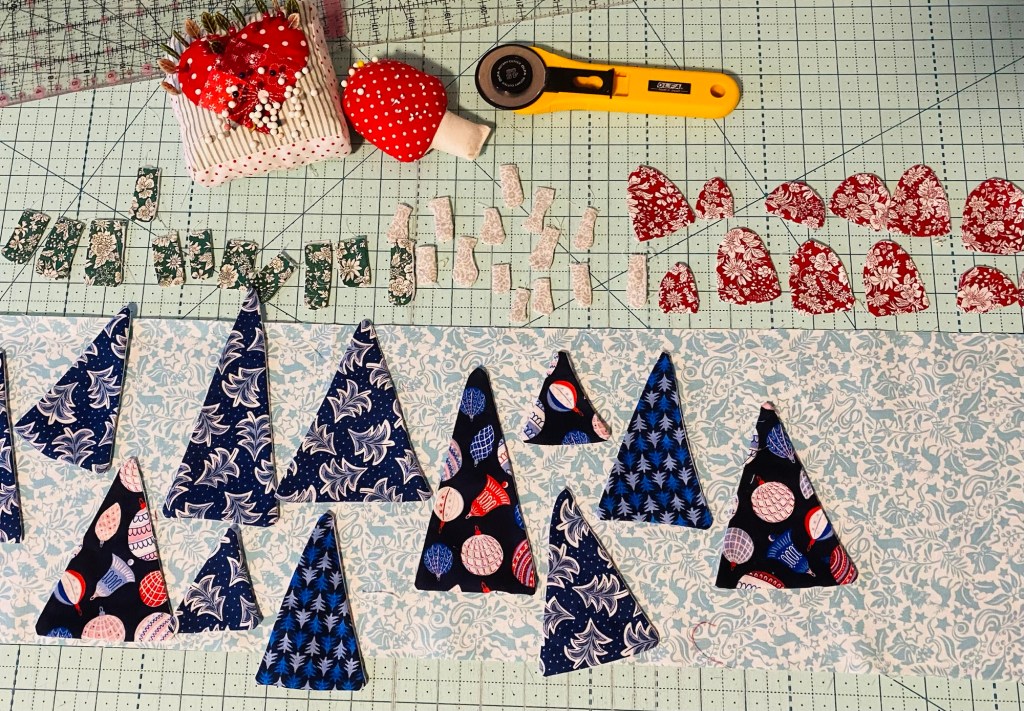
I am not a Christmas person, but I do love to decorate for winter. It adds personality to this old Victorian home during the bleak season. I’m obsessed with trees & mushrooms as they can stay out until Feb.
This runner was made with the liberty of London lines Merry & Bright and Woodland Christmas. There is no set pattern but here’s what I did, get creative and have fun.
Runner back ground was a 9 inch cut from a half yard piece of fabric, so it’s about 20 inch long once finished
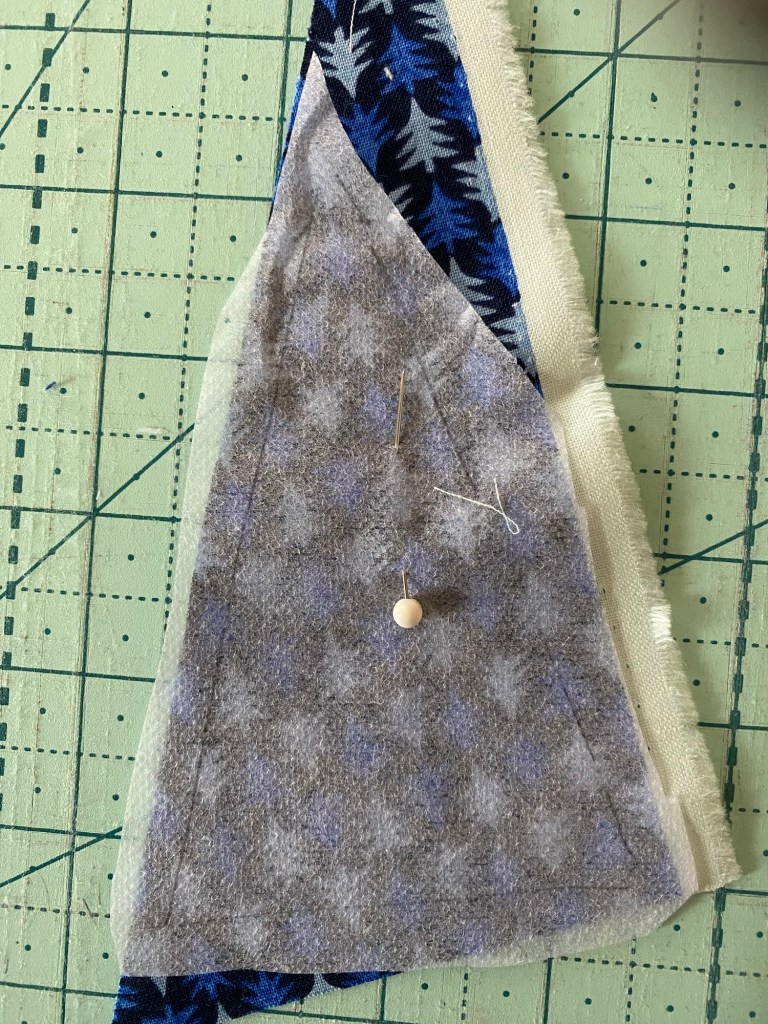
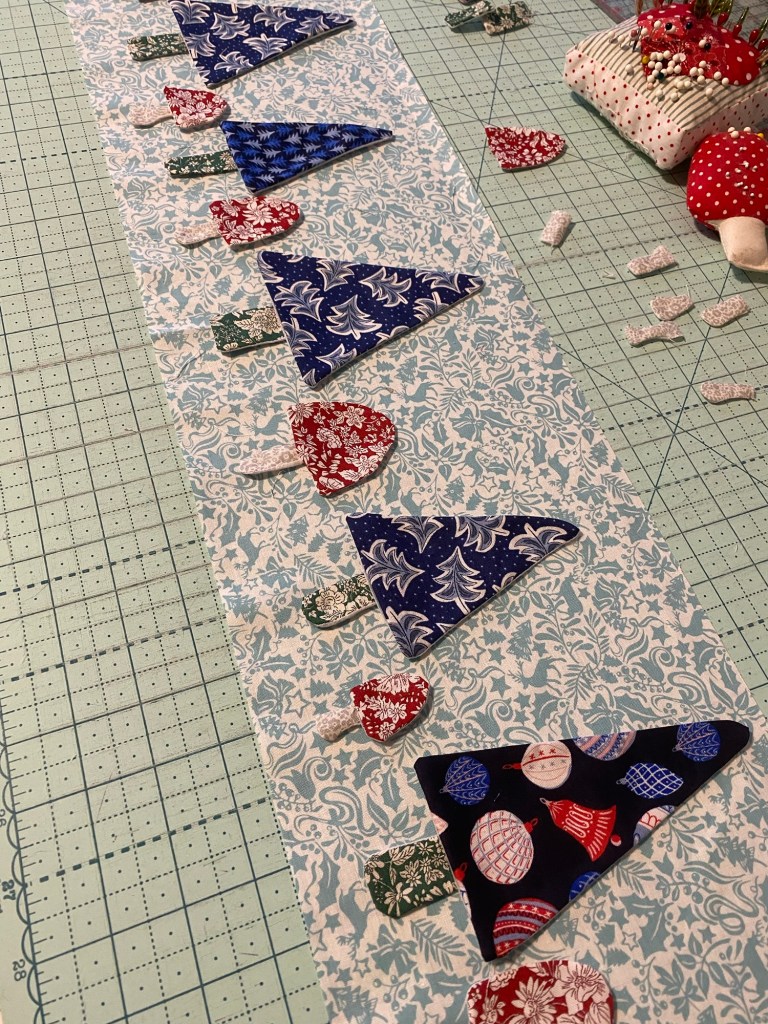
To make the trees and mushrooms: Take some lightweight interfacing and draw triangles in various sizes, trunks, mushroom bottoms and tops making sure there’s around 1 inch between shapes. Cut the shapes leaving 1/2 inch around the drawn lines so you can sew and trim. Place on fabric with the fabric right side up,you will “trap” the fabric in the interfacing. For the trees and mushroom tops sew around the whole shape. Trim to 1/8 around the shape, make a slit in the centre of the interfacing and turn the shape right sides out. For the trunks and mushroom stems, you can leave the top open and turn through that. The tops will be tucked under the trees and mushroom tops to hide them.
Once they are turned tight side out, iron.
Lay out your back piece and place the trees and mushrooms where you want and pin in place.
Sew them by machine or hand to the background. I like to use the blanket stitch in my machine.
Once you have sewn them all down, add a boarder and finish as desired.
For appliqué shapes I like to draw the shapes on card stock so I can keep the templates. Mushroom and trees are easy as there’s no set shape. I have videos on my YouTube channel on how to make & sew the appliqués and how I finish runners
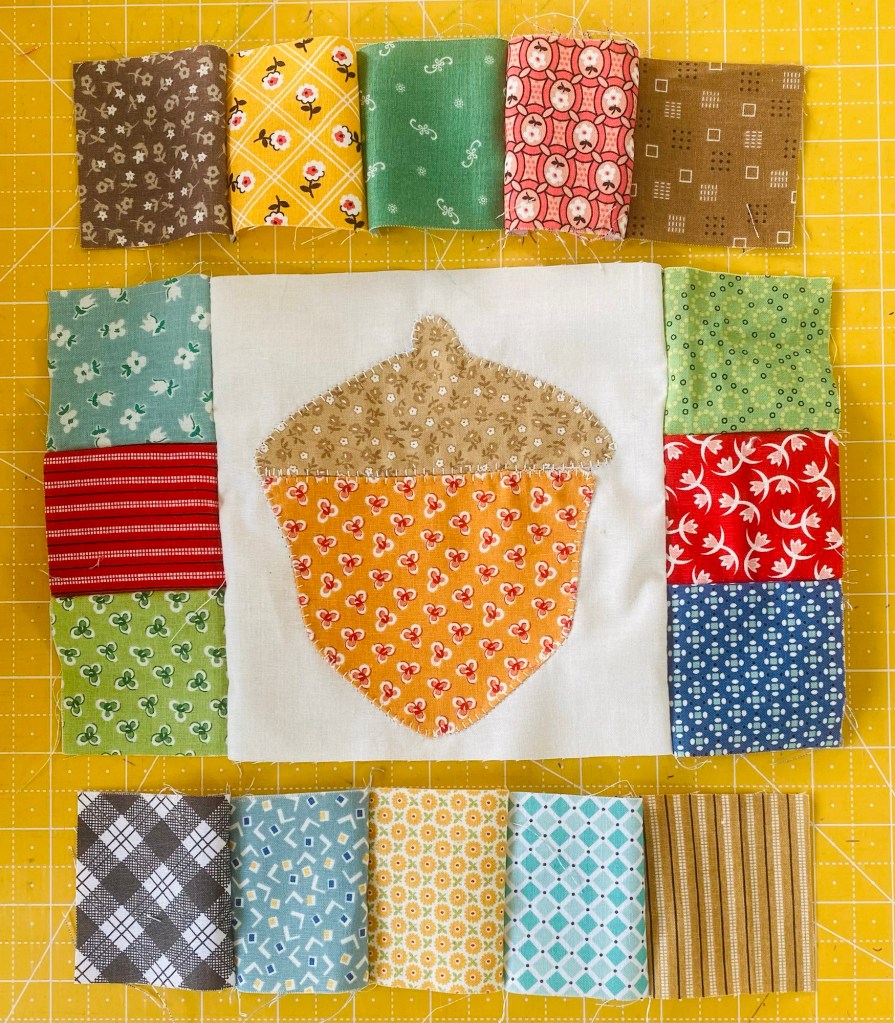
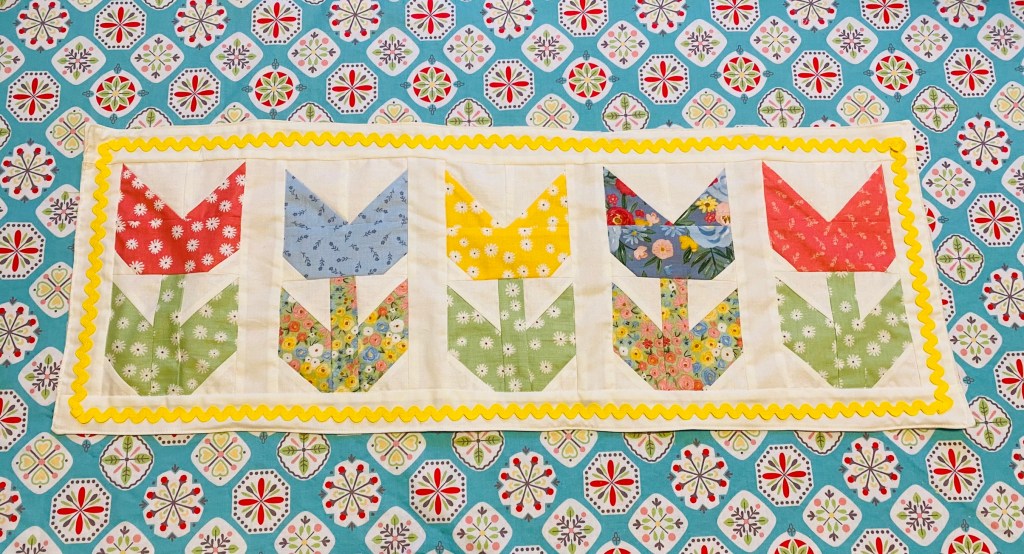
Its spring and spring means pretty flowers! Here is how to make a quick and easy runner.
Tulip Blocks: I made 5, you can make as many as you want. Material for each block:
Size: 5 inch x 9 inch
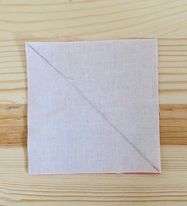
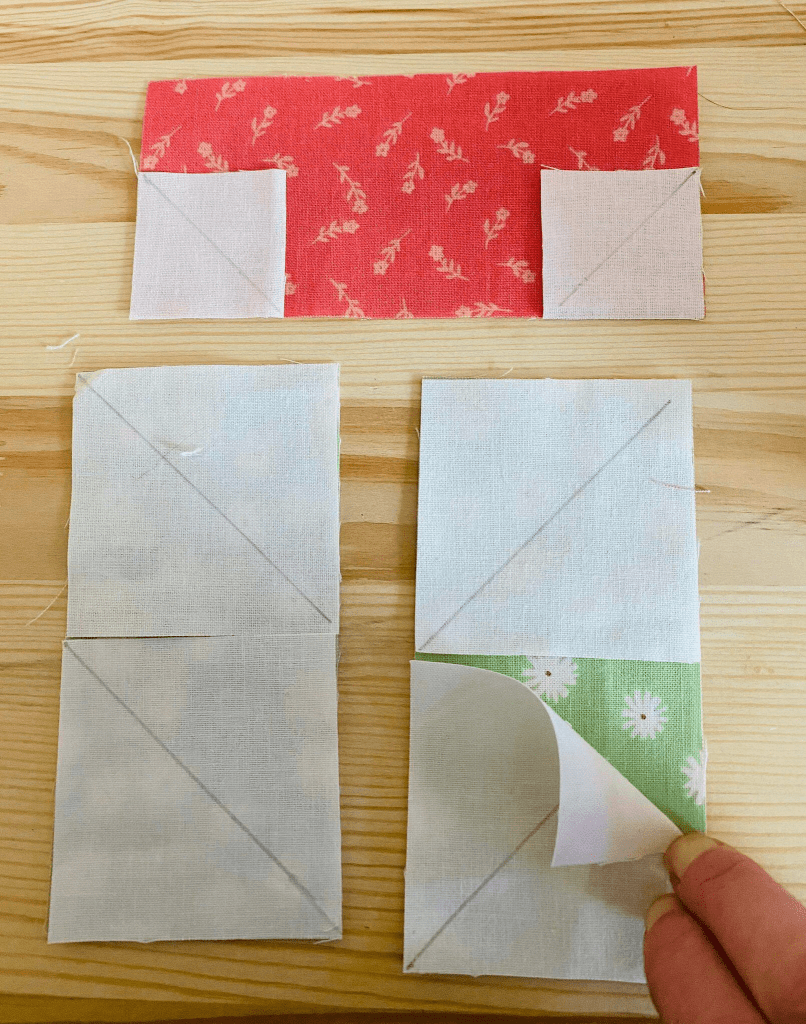
Background (white): (1) 3.5 inch (2) 1.5 inch squares (4) 2.5 inch squares Draw a diagonal line on all background squares.
Tulip: (1) 3.5 inch (1) 2.5 X 5 inch
Leaf (green): (2) 2.5 x 5 inch
Stem (green): (1) 1.5 x 5 inch
Sashing: (6) 2 inch x 9 inch Strips in background (I used off white). (2) Strips of 2 inch background as long as your finished runner for top and bottom boarders.
Backing: as big as your finished runner. I used less then 1/2 yard.
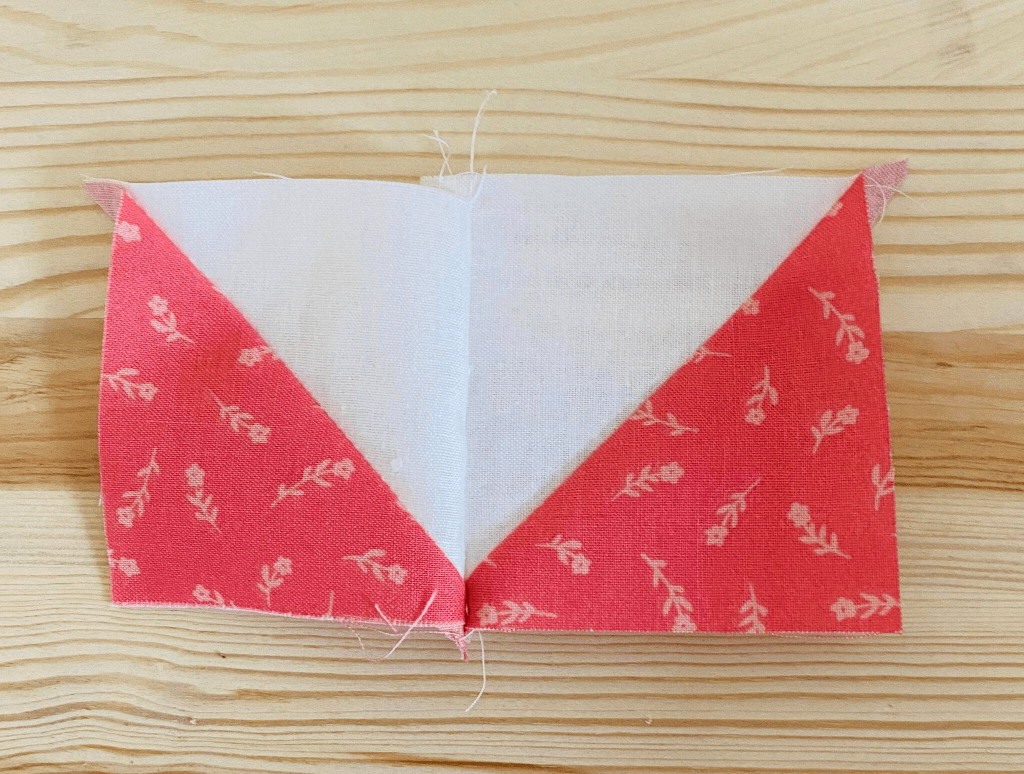
Place the 3.5 white square on top of the 3.5 inch tulip square. Sew 1/4 inch away from the diagonal line. Repeat on the other side of the line. Cut on the line to make 2 half square triangles.
Place the two half square triangles side by side, make sure the bottom points are in line with each other, fold over top the other and sew the center seam.
The top of the tulip will look like this
Place the 1.5 inch white squares on top of the bottom corners of the 2.5×5 inch tulip piece. Sew directly on the line. Cut 1/4 inch away from the sewn line and fold the corners back. Place the 2.5 inch white squares on the 2.5×5 inch leaf piece as shown. sew directly on the line, cut 1/4 inch away from the sewn line and fold back the corners.
Tulip top: Sew the two pieces together as shown. Leave/stem: Set up as shown and sew together. Last sew the top tulip flower to the bottom stem/leaf section. They may not match perfectly together, center the center of the tulip flower in the center of the stem, this will center it all. Sew the sections together Trim to 5 inch wide / 9 inch long.
Sew the 2×9 background strips in between each tulip and the ends. Sew the top and bottom strips on.
Place on backing with good side down, sew all the way around leaving a turning gap. Turn right sides out, iron, sew close to the edge all the way around. Add trim like ricrac if desired.
The greatest thing of New Years is learning from last year and move on. The past is to learn from, aside from re-enactment, I love my wartime knit ware and would dress 40s style anyday!
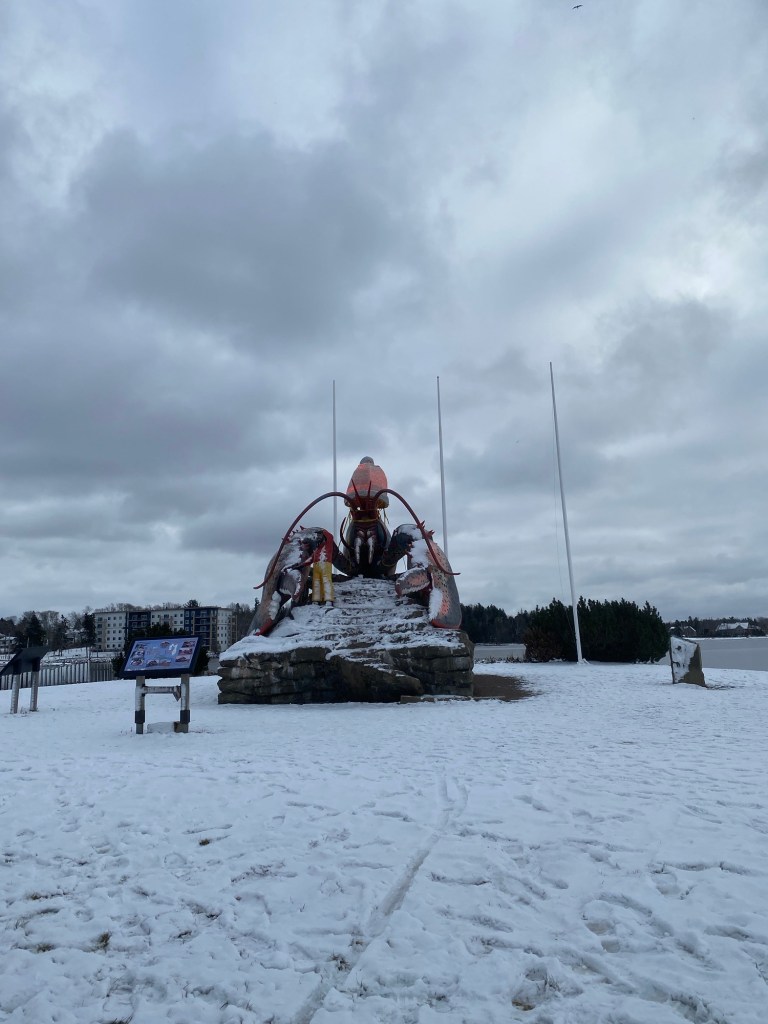
Our first adventure of the year was to Shediac and Bouctouche. The lobster in Shediac had a Santa hat on, very festive! We toured around town then headed north. We hadn’t been up that way yet.
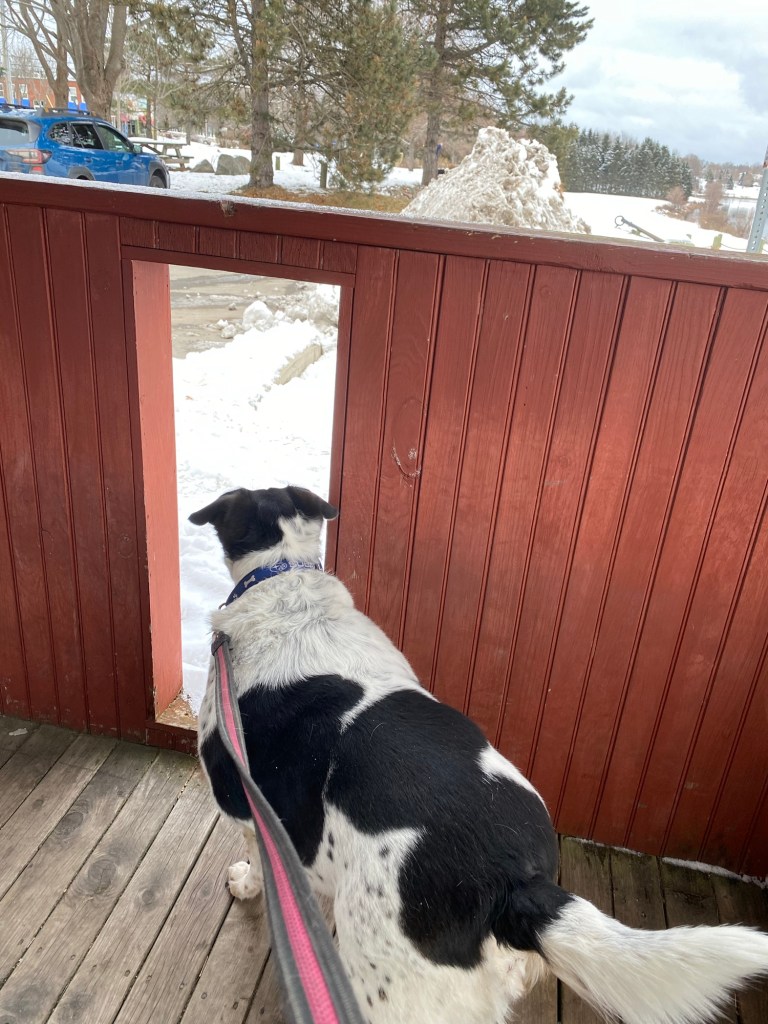
We stopped by the little lookout in Bouctouche for a walk, Ellie loved looking through the puppy look puts in the gazebo, we had to look through each one! We say huge anchors, smelled trees then headed home. It was New Year’s Day so nothing was open but it was good to explore, the drive is beautiful!
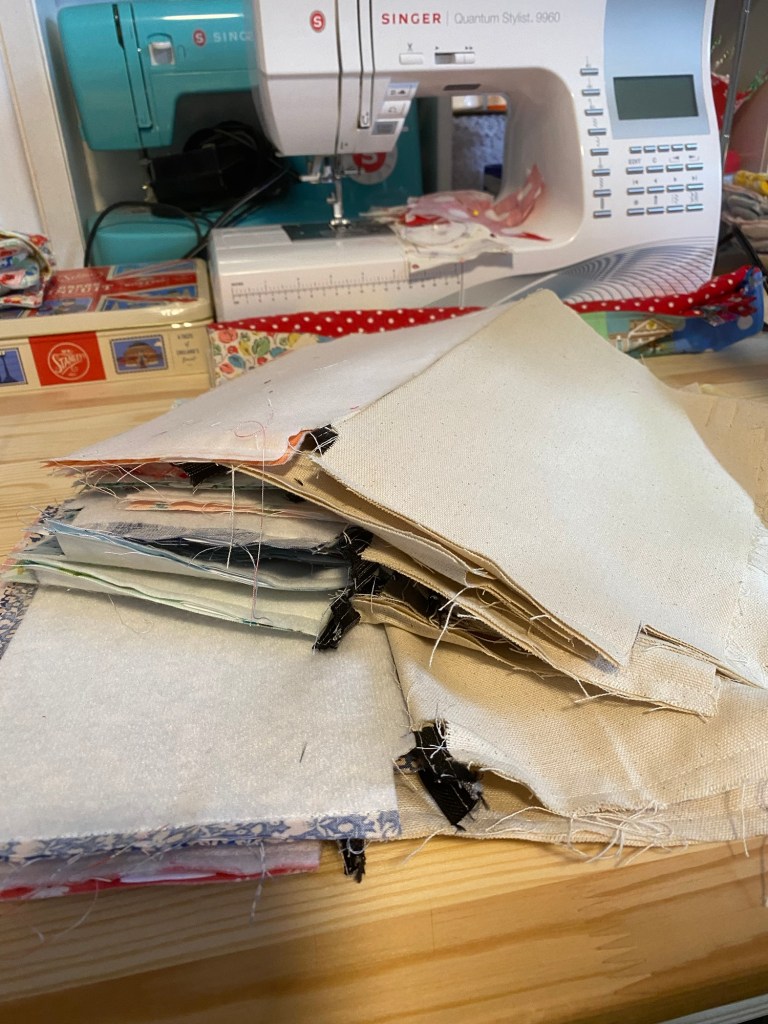
New stuff on my work table for this year are a few stuff toys, Patchwork placemats, and pillows with anchors. The new items break up the repetitiveness of bag making lol, yes lots & lots of my signature zippy pouches are in the works too
There’s the working on pile and stock pile .. going to need more bins!
The aim this year is to have enough that I’m not sewing every night in the summer. Hopefully it works out.
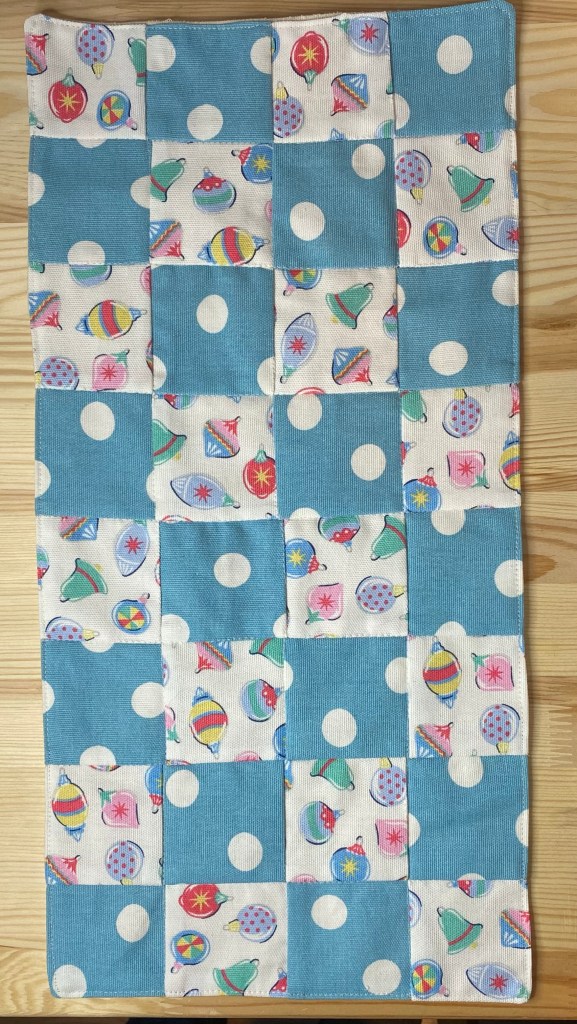
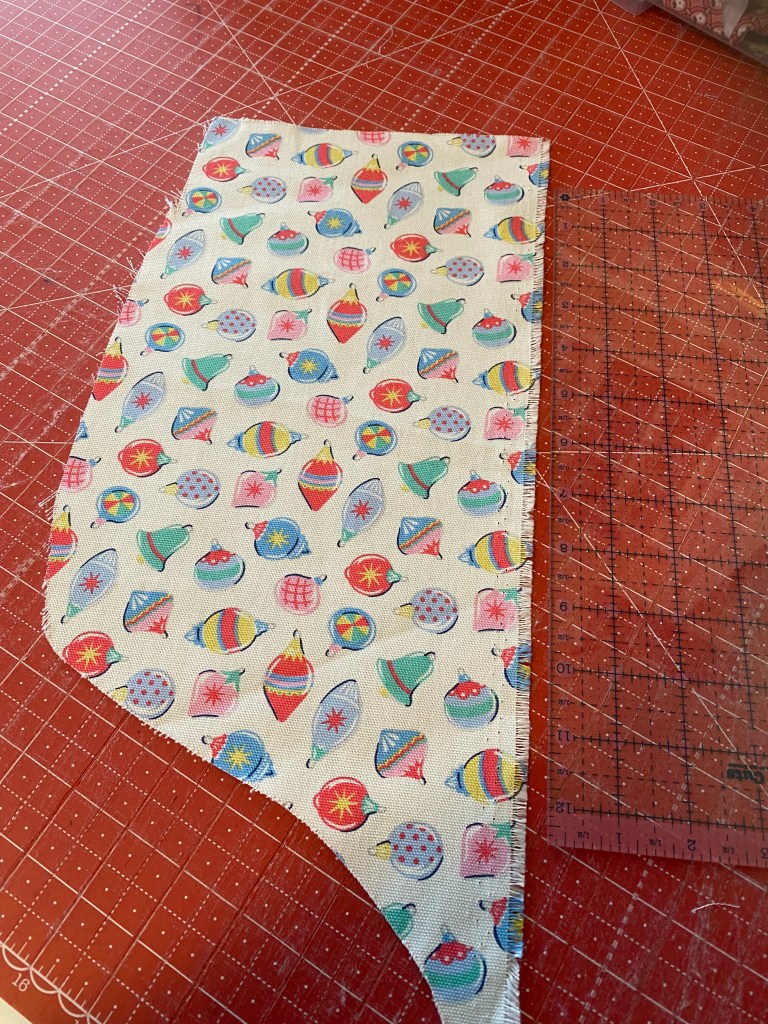
I am a HUGE Cath Kidston fan, of the older style.. and when I saw these remnants from the textile factory in Portugal, I had to get them. They were small but also impossible to find any of these prints.
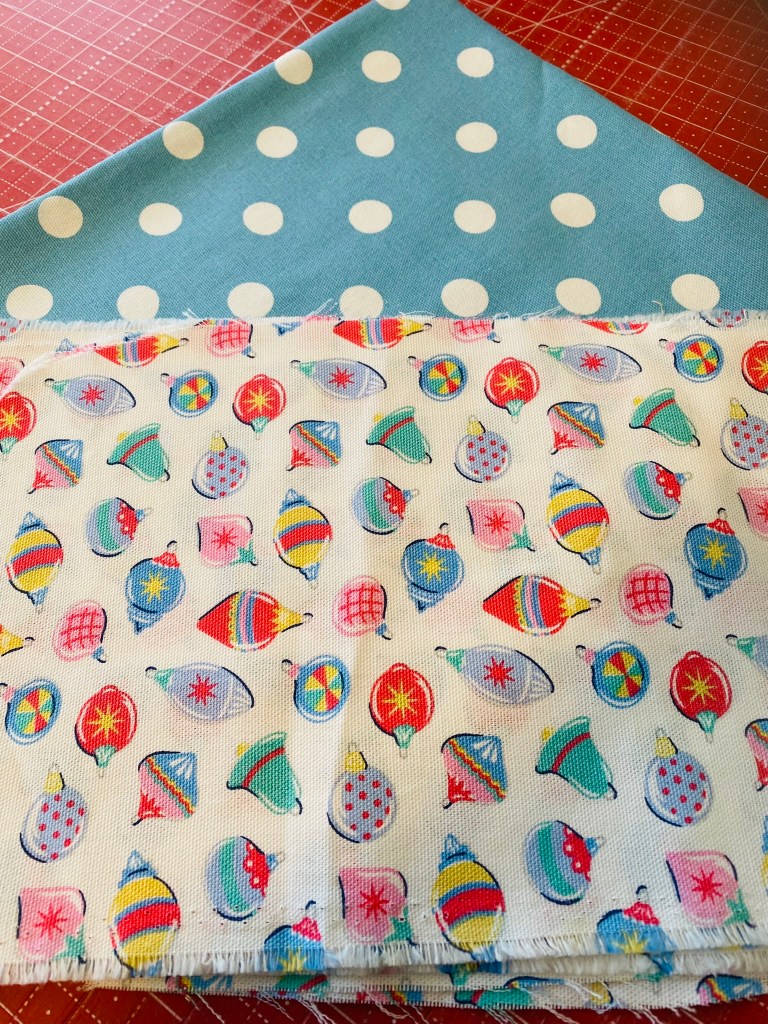
The useable portion was about 7 inch x 13 inch. When I opened the package these two prints (of course I had to buy others that they had!) were beside each other and screamed.. “Use me together!”
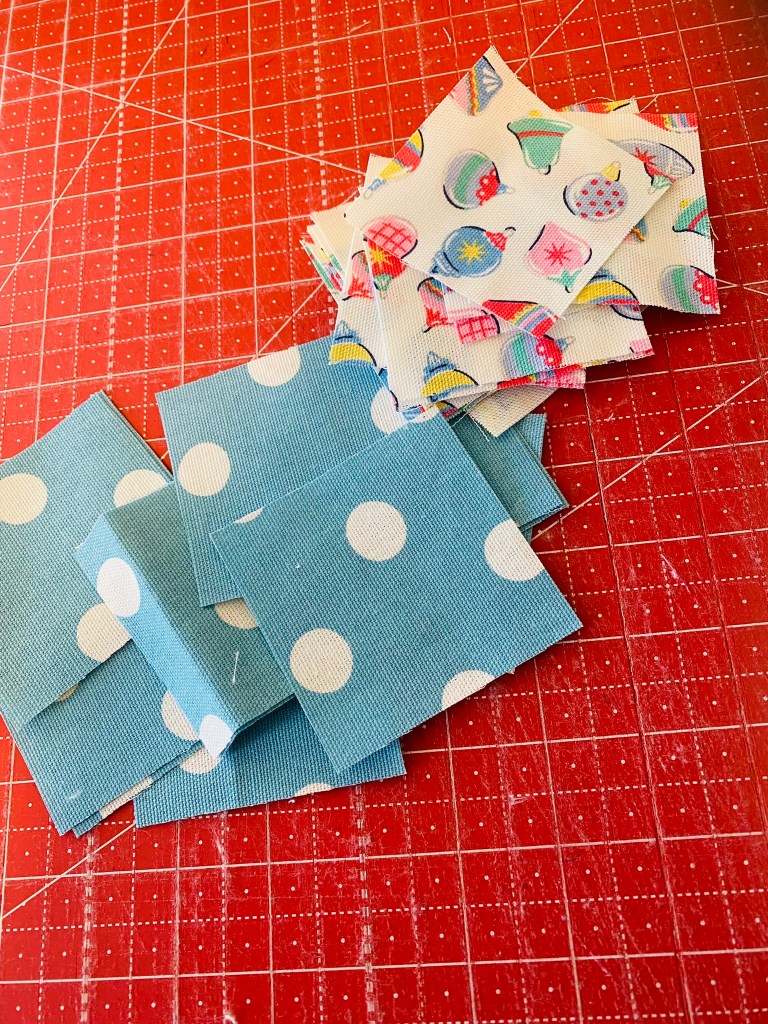
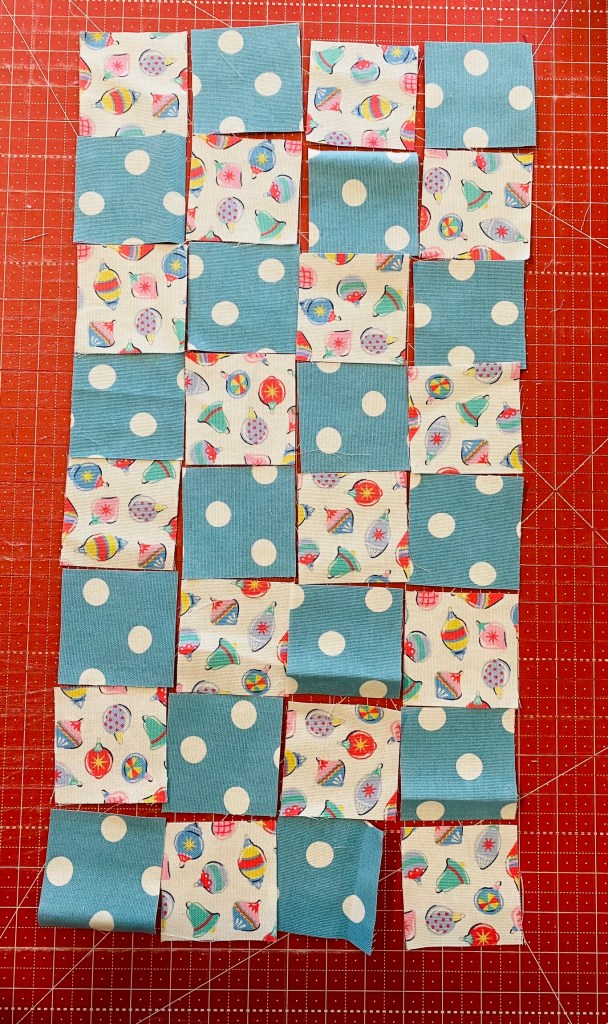
Blue polka dots and vintage ornaments.. Perfect for my holiday decorating, its all blue & silver, these will fit right in! So to figure out what to do with them.. Patchwork of course!
I figured 3 inch squares would make the most out of the material. I got 9 squares from a remnant, so I cut up two of them. I didn’t want to make it too big incase it didn’t turnout as my head figured it would. I cut 18 3 inch squares of the blue dots to match
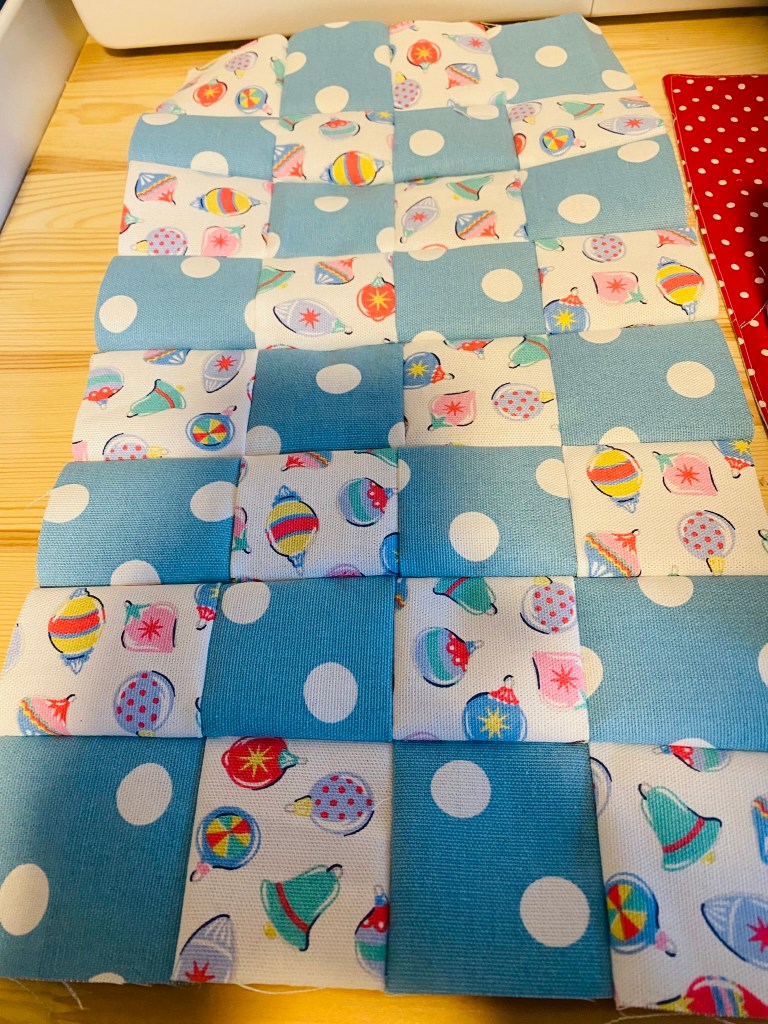
Once laid out.. I was in love… soooooooo in love! Time to sew!
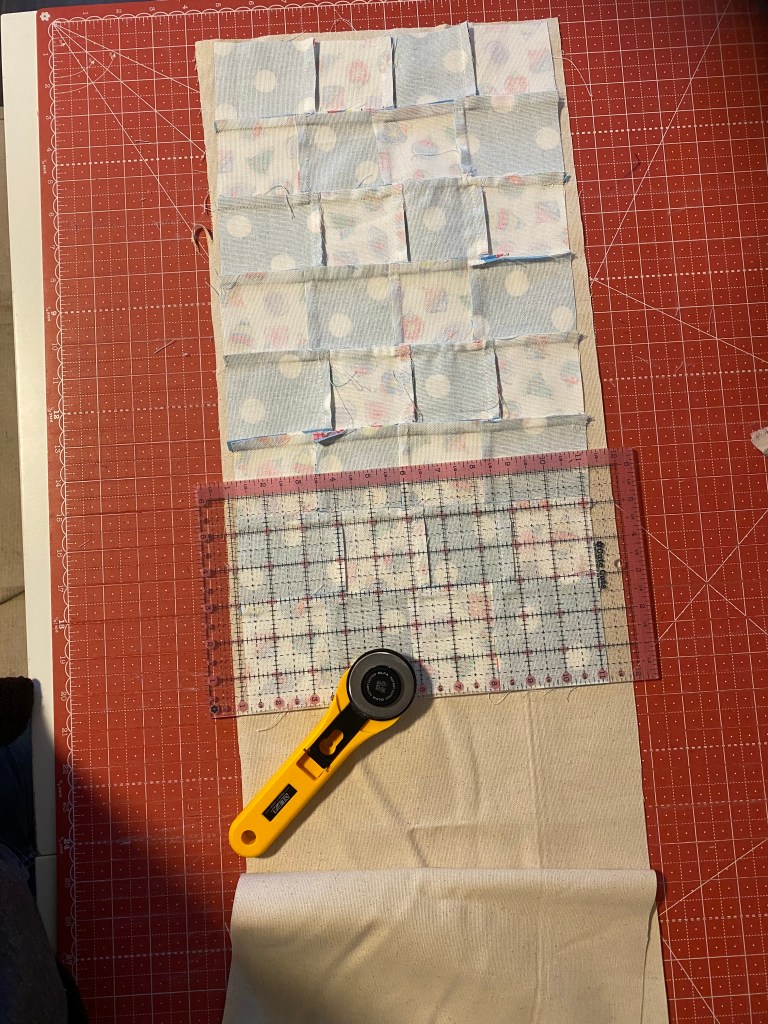
Soooo pretty! Onto press well and cut the backing
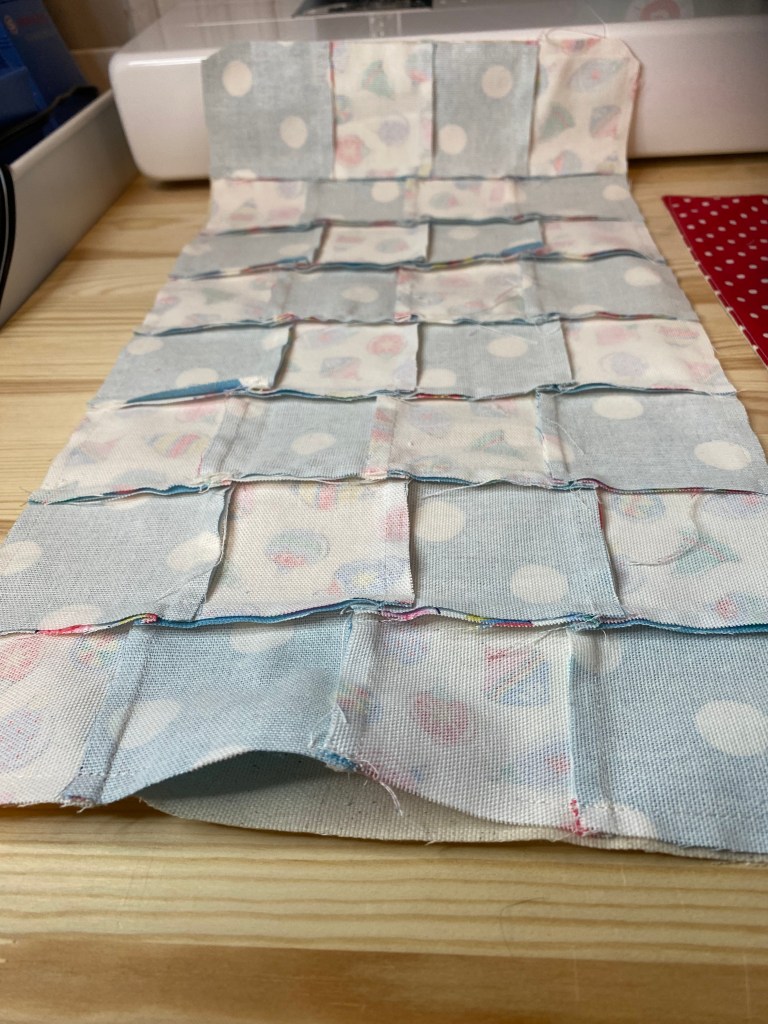
Once cut to size and trimmed, I sewed all around leaving a turning gap. I hate binding and will avoid it at all costs! There is also no batting .. I don’t like batting in my tableware if possible (pot holder aside) I find batting makes it look to “crafty”.
Time to turn it right side out and press again. I top stitched all the seam lines with simple stitch in the ditch and a 1/8 top stitch around the whole runner. It is honestly one of my favorite holiday textiles now.. loooove!
Other fun stuff lately.. a bunch of us went to see the Glenn Miller Orchestra in Moncton at the Capital Theatre. Amazing venue for it. The band is a continuation of the original and were absolutely amazing! If you are into swing, they are a must see!
Fun time had by all!
Till the next time, keep smiling.. and make things! Vall
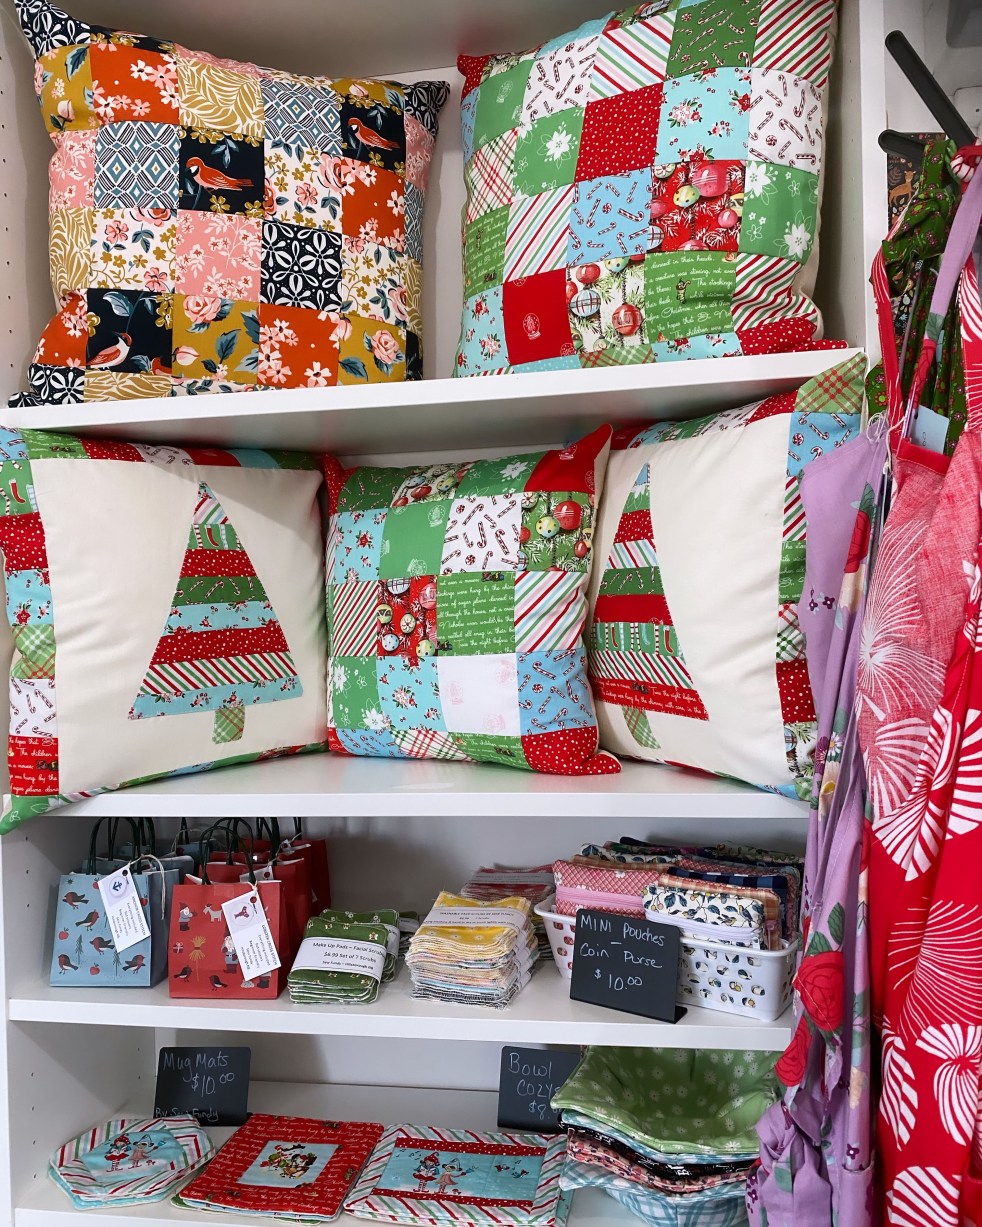
It’s the time of year I wish I had more time to prepare for! It’s been a busy fall at the shop, new stuff arriving, clearing out older stock and making room for a Christmas section, which is starting to look rather nice.
I’m loving the scrappy tree pillows, I have a pattern written and will hopefully have it up for sale soon.
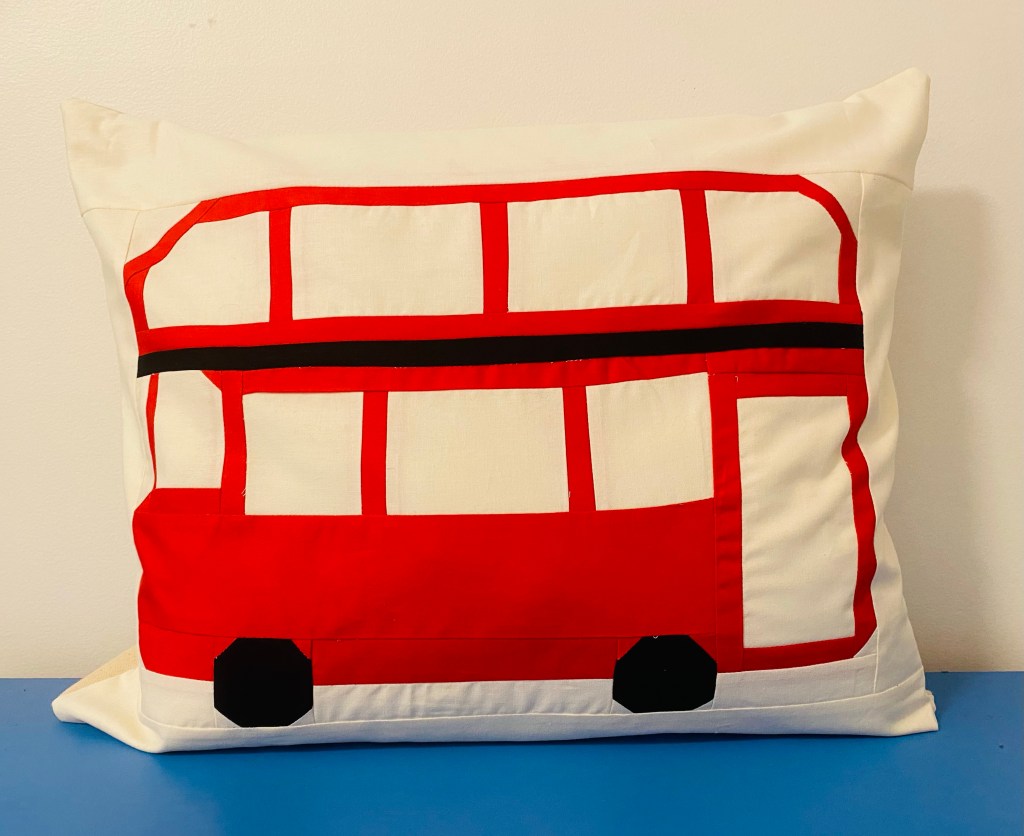
I wanted to have some unique, non Christmas stuff out in the shop & this weekends market in Riverside Albert for Christmas in the Country, so I made up a double decker bus pillow & working on a Liberty pillow tonight
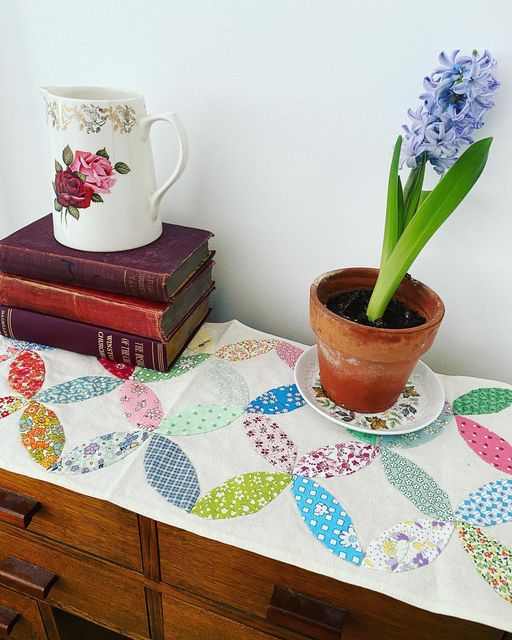
Its Easter, finally. This has been a long winter, I can’t wait to see the end of the cold white stuff outside. I have planted tulips & hyacinths in the house, they always cheer me up this time of year.
The runner is one of my favorites. Appliqued orange peels made with vintage feedsack prints on a simple linen runner.
Orange peels can be made in many ways, I like to use the Sue Daley leaf papers. I prep the papers the same way as for any English paper piecing project but once glued I give it a good iron, remove the papers and press again. They are then ready to use.
For this runner I used a marking pen to mark grid lines, laid the orange peels out and pinned down. Then hand sewed them on. Simple & vintage.
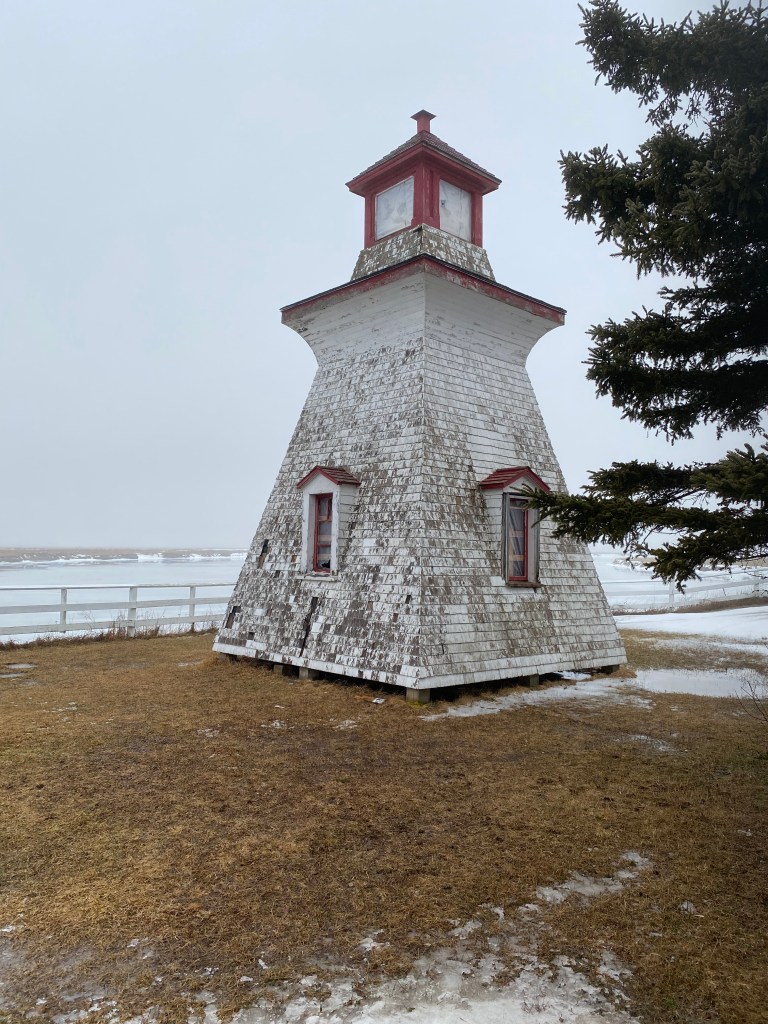
Explore Fundy:
Harvey Bank
This is a little gem, a light house, anchor and skeleton of a ship. This sweet spot is in Harvey Bank located on Marys Point Road, just off route 915. If you are heading to Cape Enrage or Waterside its a must stop. Its not very far from route 915, quiet, quaint and well worth the stop. Who doesn’t like finding light houses? Its small but cute!
Shop Updates:
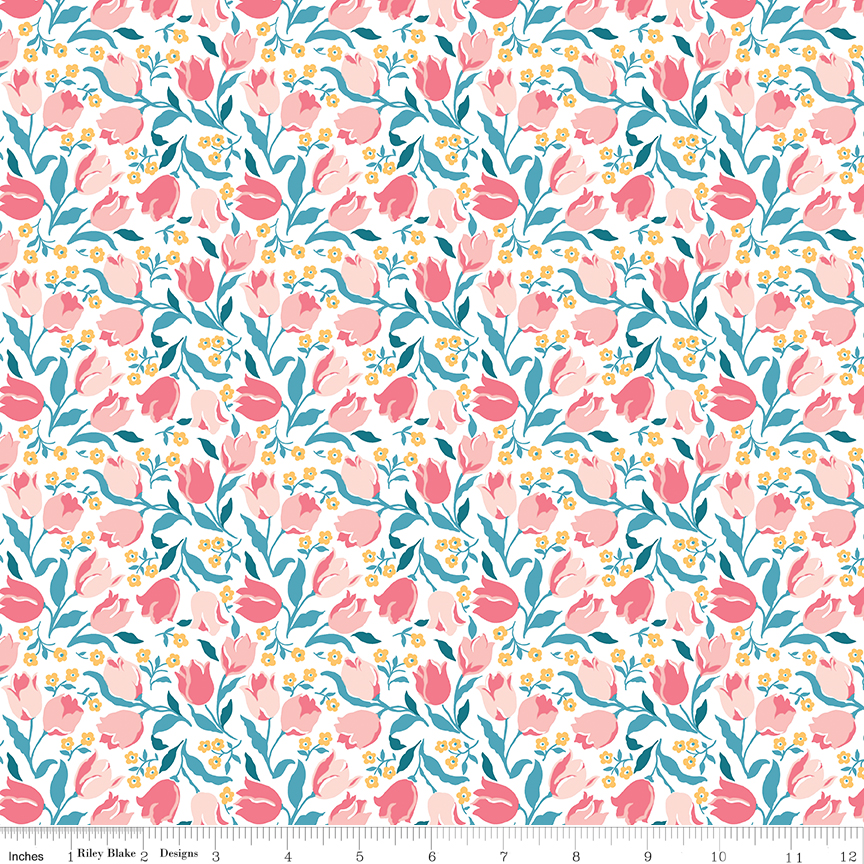
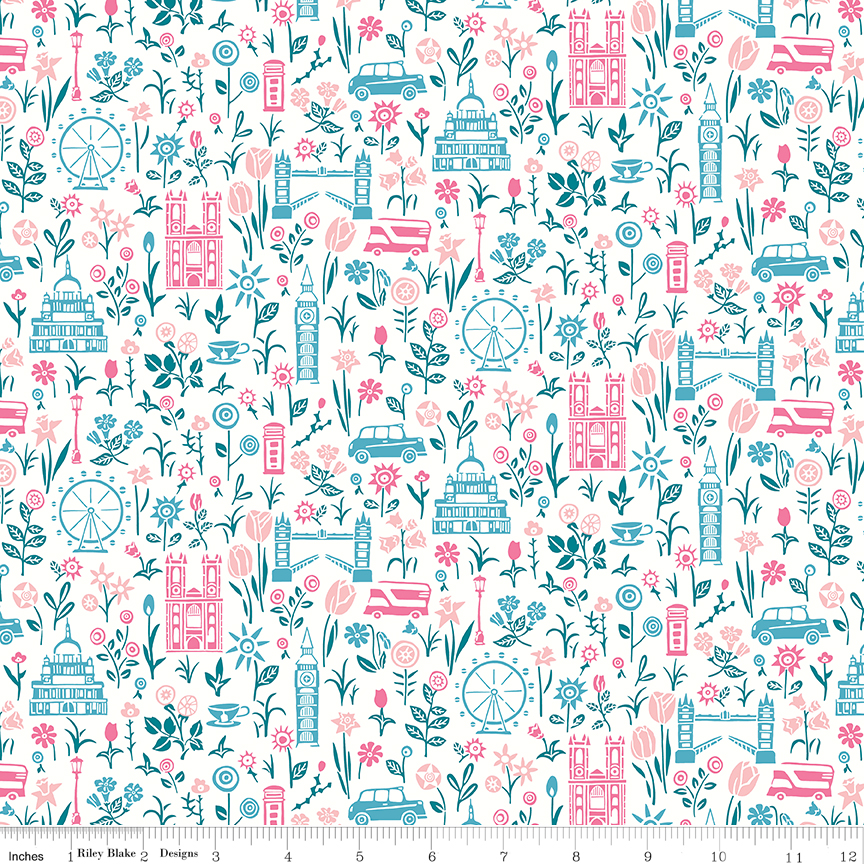
The Liberty of London line London Parks is in and yes there are some London City Prints! I LOVE this line! Along with London icons there are tulips, coronations, and other assorted florals, all those pretty things Liberty is famous for!
I couldn’t wait to use these prints, made a simple pillow with fussy cut center squares of the Tower of London and Big Ben!
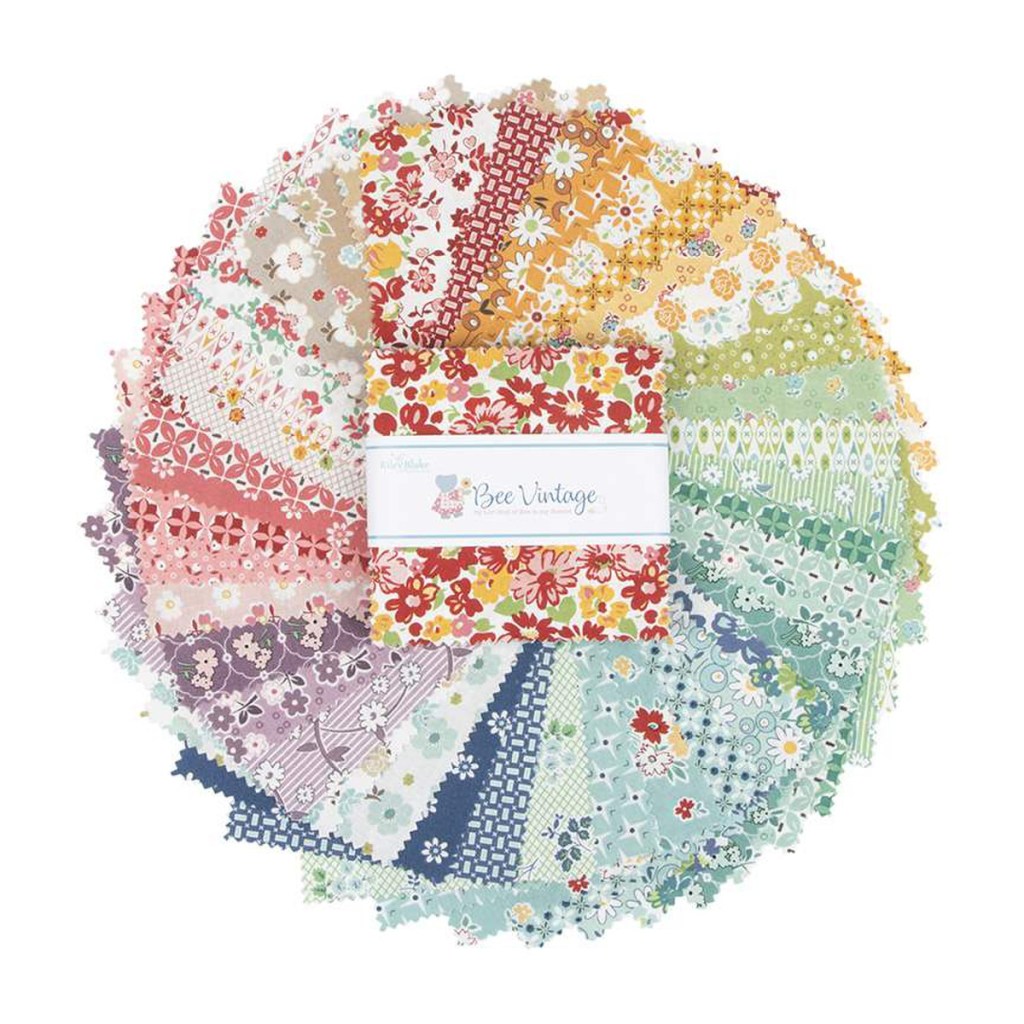
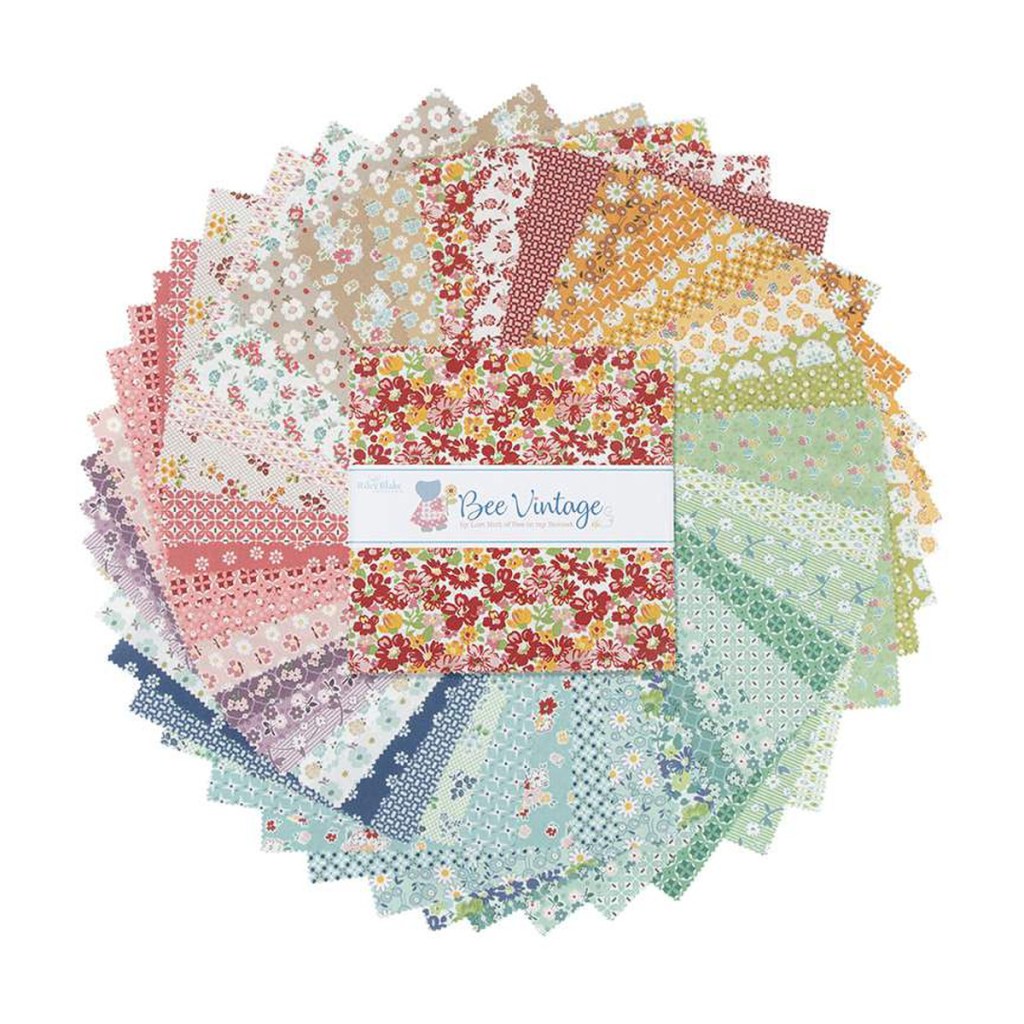
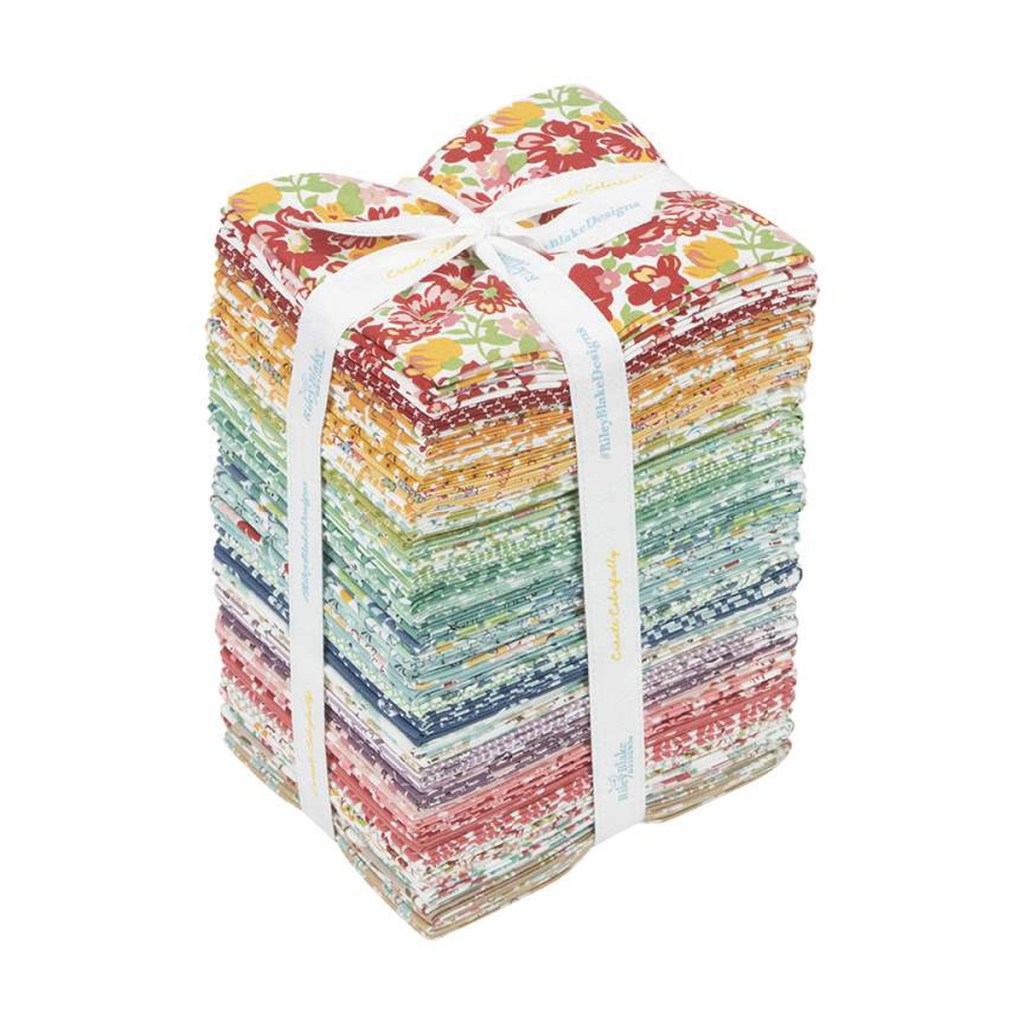
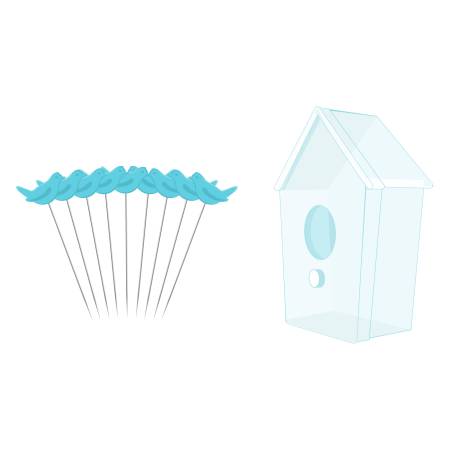
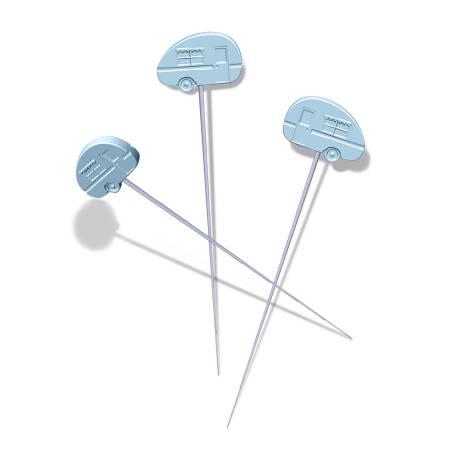
There were a few new things in the shop this week, some of the Bee Vintage line by Lori Holt showed up in fat quarter bundles, charms packs and 10 inch squares. New notions like quilt clips in the sweetest tin. Pins with campers & birds are in too!
I leave off wishing you all a very happy Easter! May the bunny come and leave you chocolates 😀
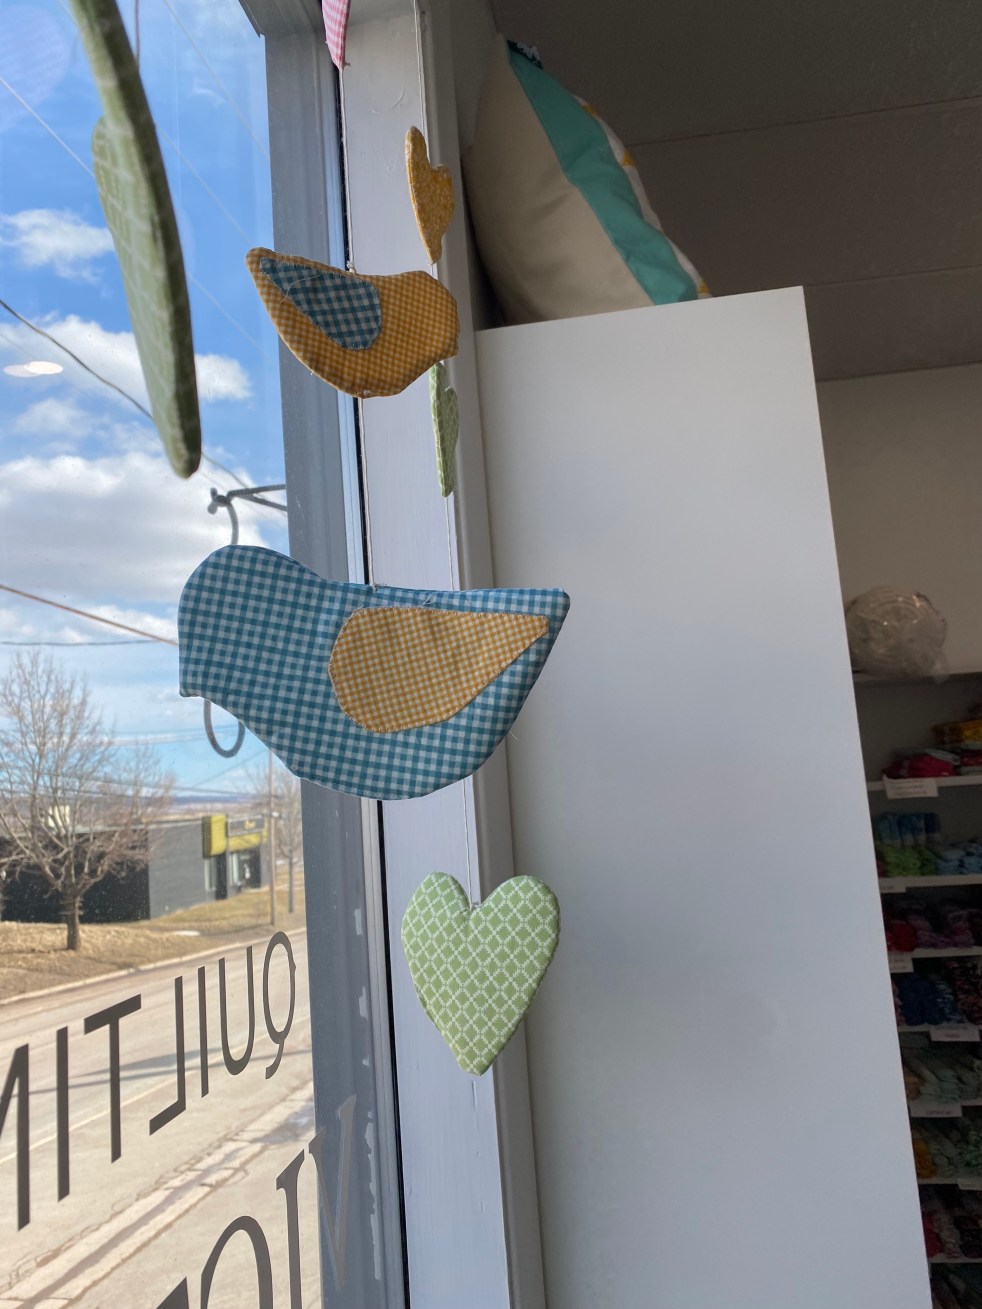
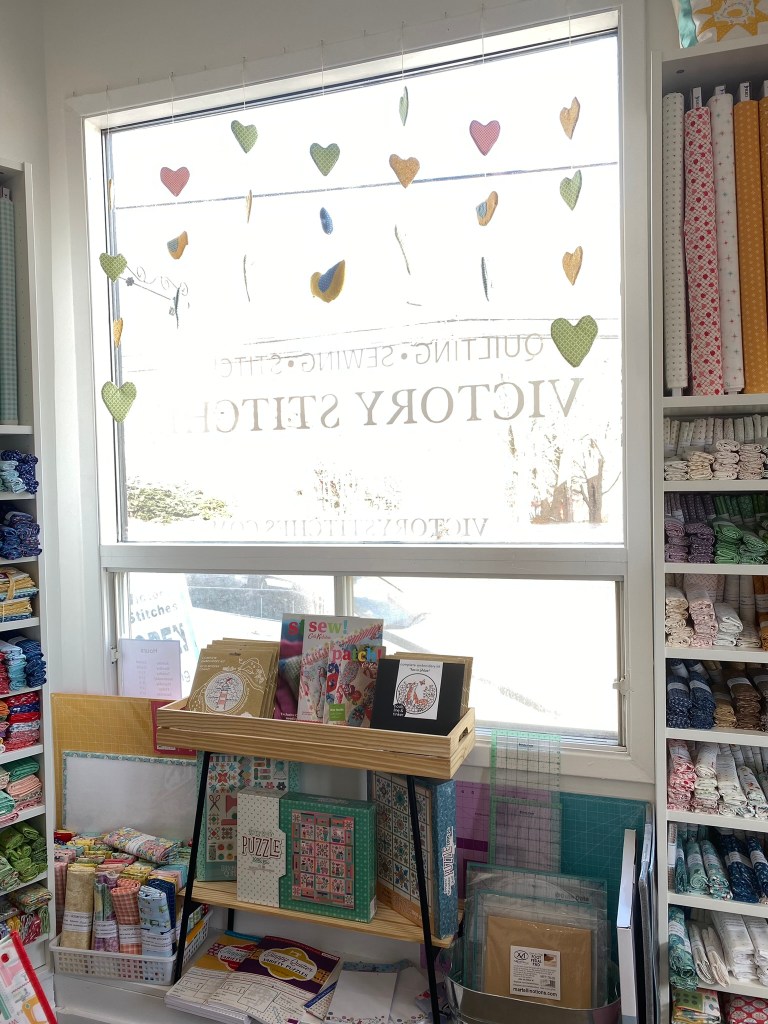
Here is how to make the cheery window mobiles I have at the shop. They are simple and cute as heck!
First collect materials:
Shapes: Take easy shapes from colouring books, quilt books, online etc. Do not make them complicated but stick to hearts, birds, owls, simple bunny outlines etc. Get the picture to the size you want and cut out or make a template.
Fabric of your choosing
Interfacing such as foam, fleece or batting. If using batting double it up for better structure.
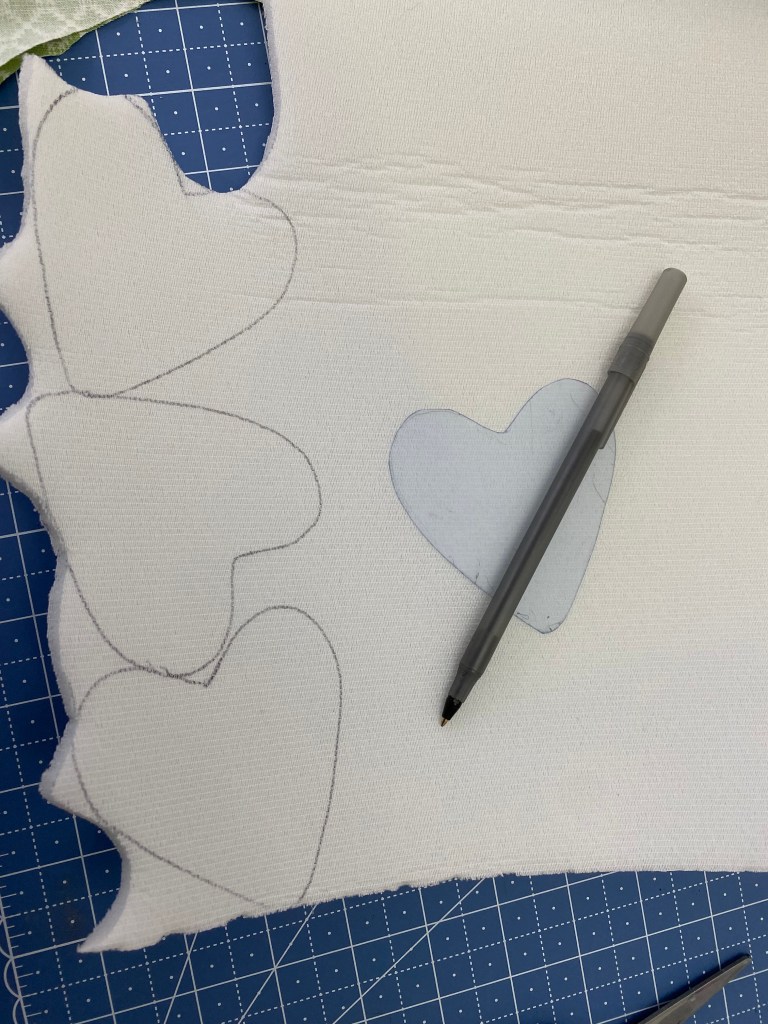
Trace the shape onto the foam/batting etc and cut out.
For the fabric: for simple shapes like hearts trace one side only and use a large enough scrap for the opposite side or fold it like shown here. For directional shapes like birds, trace two (one per side) by flipping the template before tracing. If need to add wings etc. do it before going on to the next step. Leave some room between the shapes
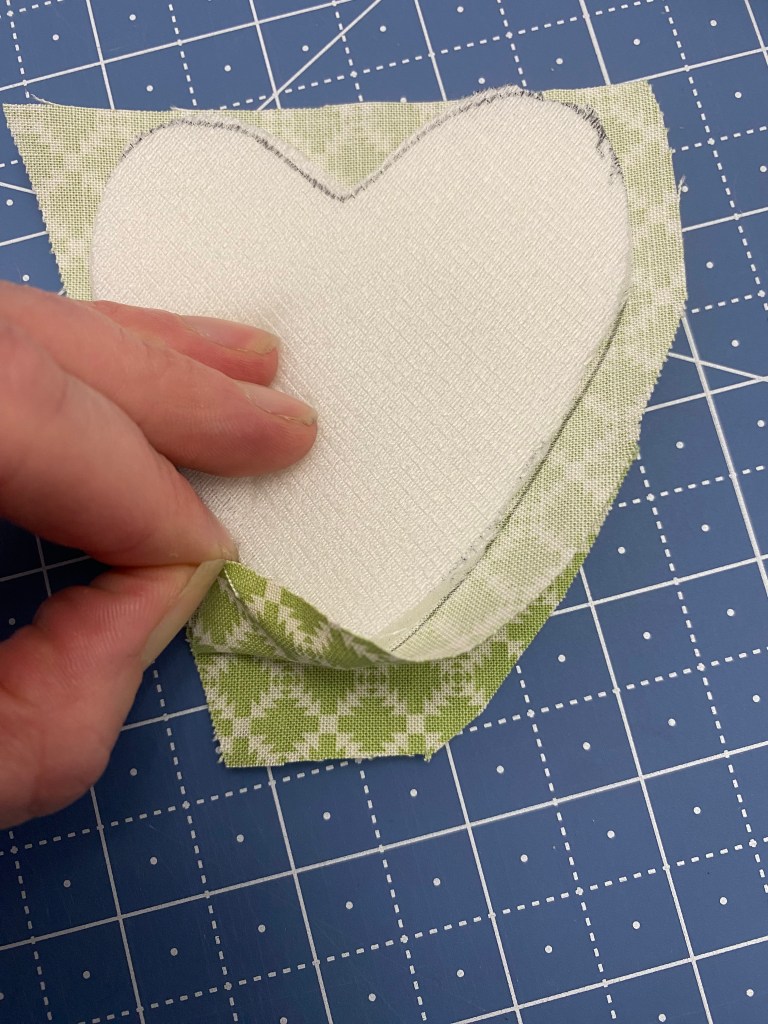
Line it all up as follows: Bottom fabric with traced shape good side up if directional like a bird or just a plain or folded piece as shown in the picture. Place fabric with traced shape good side down. Make sure traced shapes line up if they have extras like wings etc. Place foam in the traced lines. If the foam is fusible, you can iron set it onto one of the fabric traced shapes to make it easier. If not use a glue stick to stick it in place.
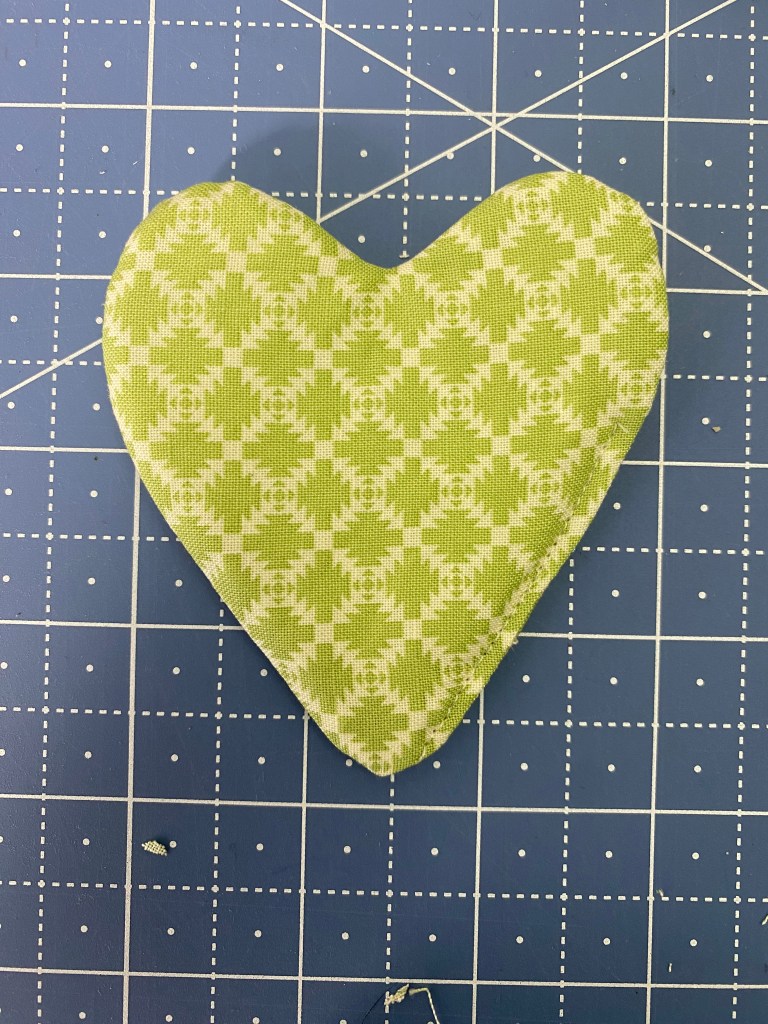
Sew around on the traced lines, leave a gap for turning, turn right side out, make it look pretty, iron and and stitch or close stitch by machine closed.
Use string to connect the shapes and hang from a small nail or tack from the window
The beautiful and picturesque Fundy National Park.
This past Sunday we packed the pups in the car for a trip down the road, its a beautiful drive from Hillsborough to Alma/Fundy National Park. Scouse and Ellie were happy to get out and smell new things. We all needed out of the house, the weather was good and needed the mental break.
Unlike summertime, you can go to the lookout and be the only ones there. It was quite icy out, the snow super crunchy but the pups didn’t mind.. just happy to look, smell and get out somewhere other then our house.
We stopped in Alma for pizza at Soprano’s, highly recommend stopping to eat there.. YUM!
What’s up in the Studio?
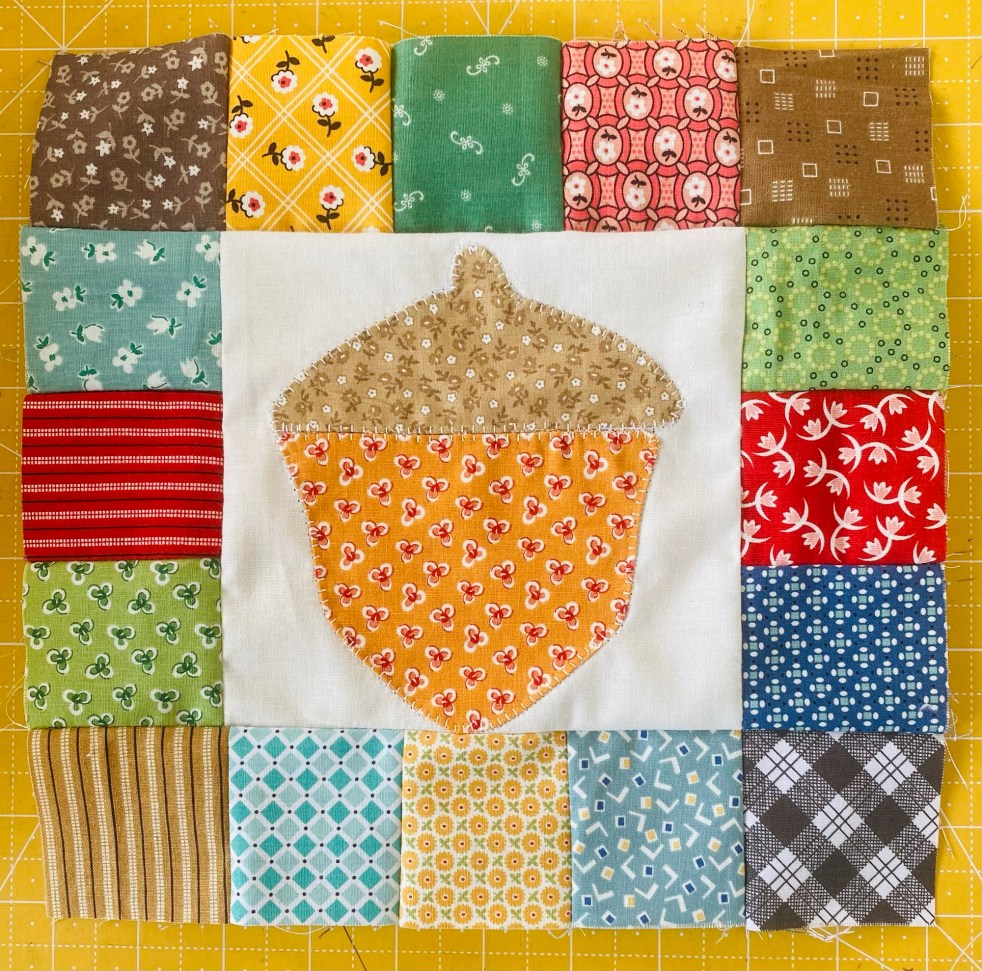
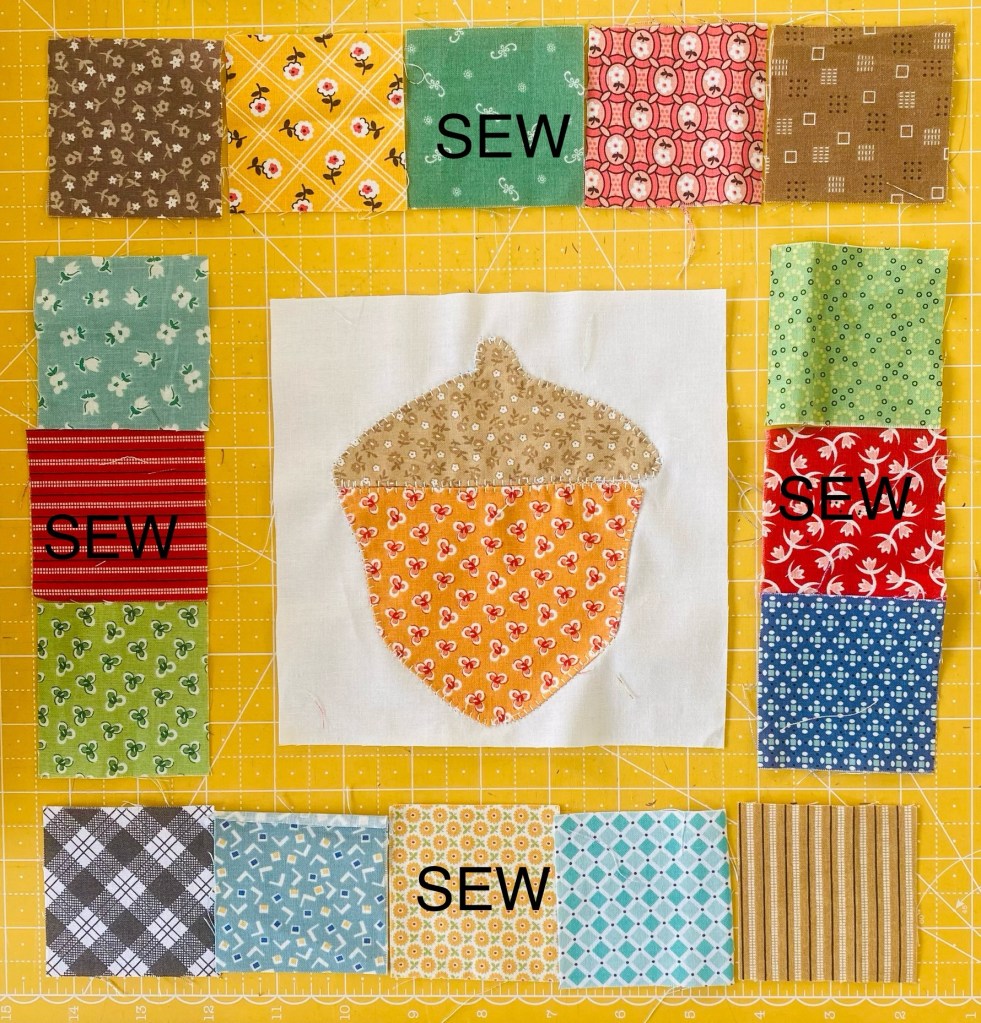
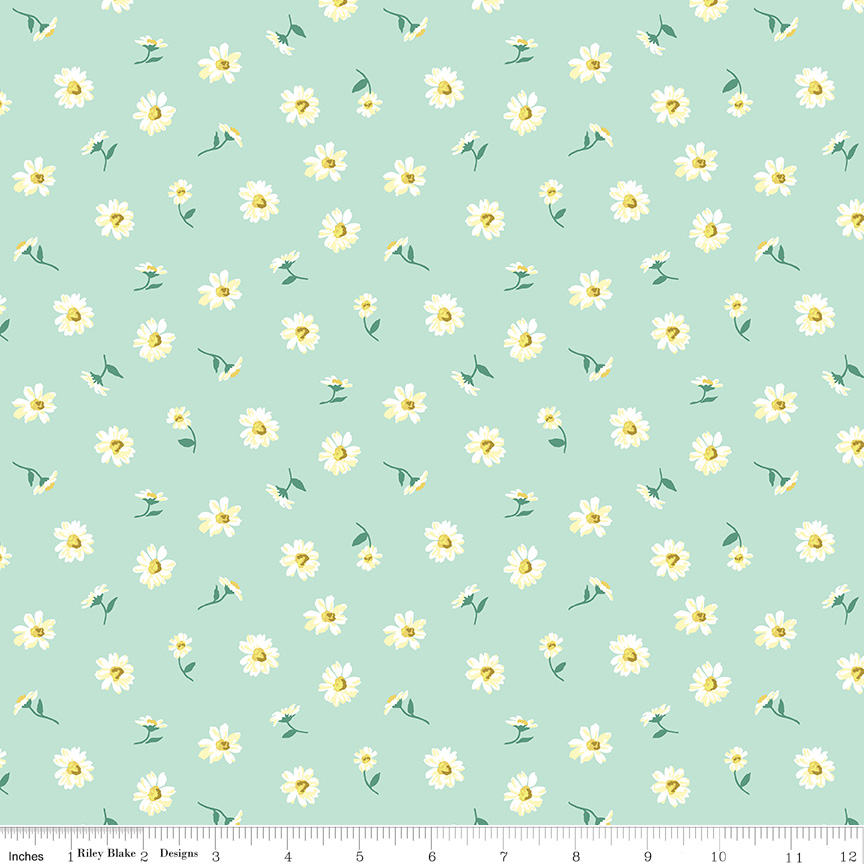
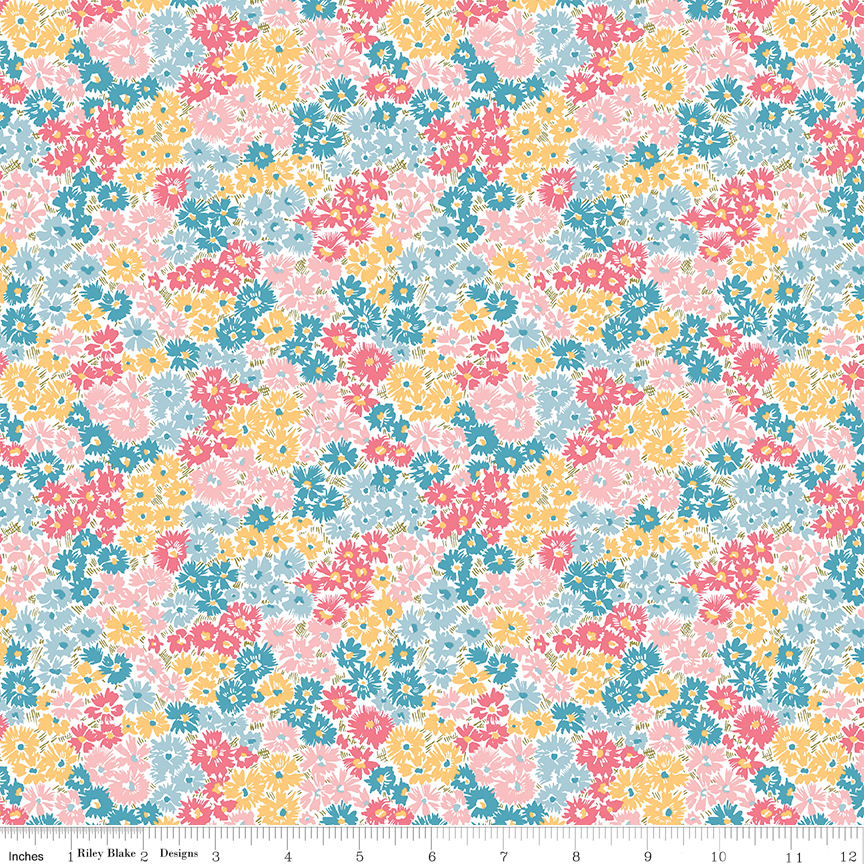
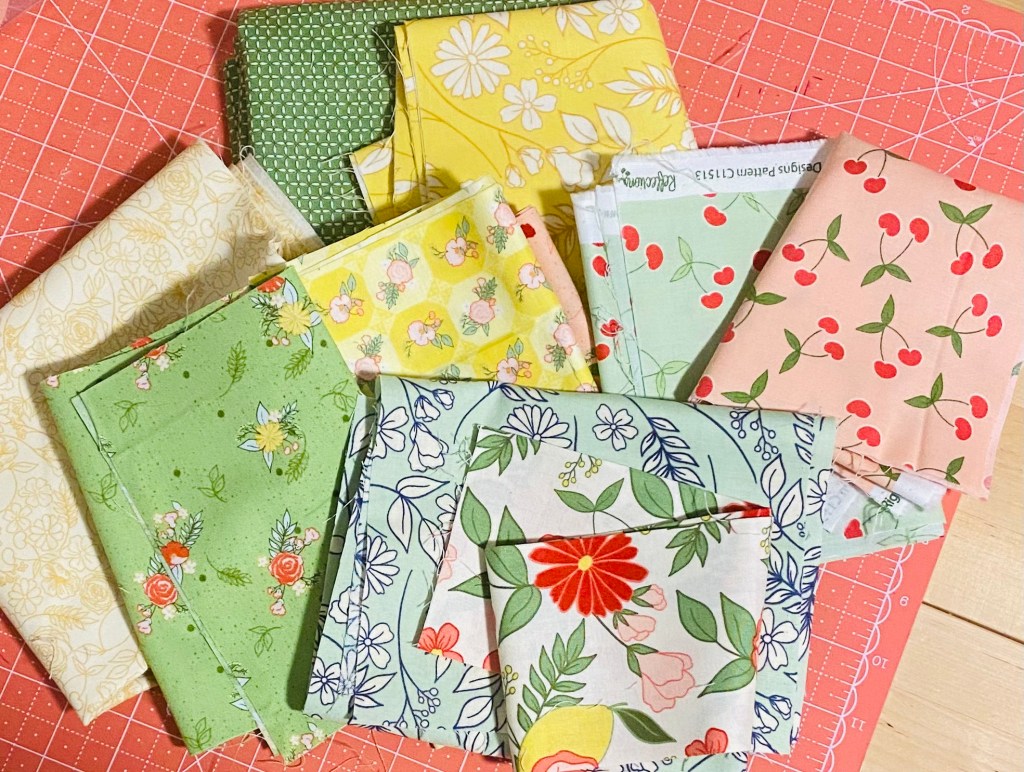
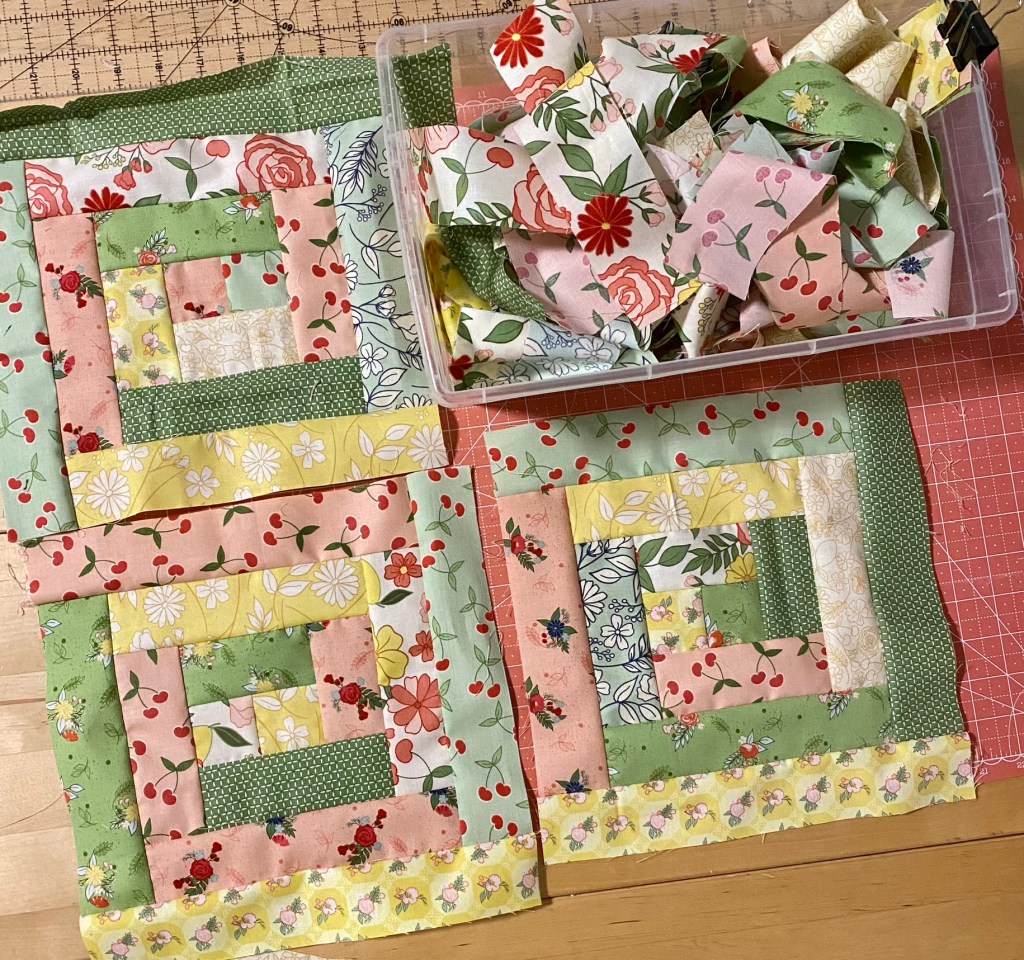
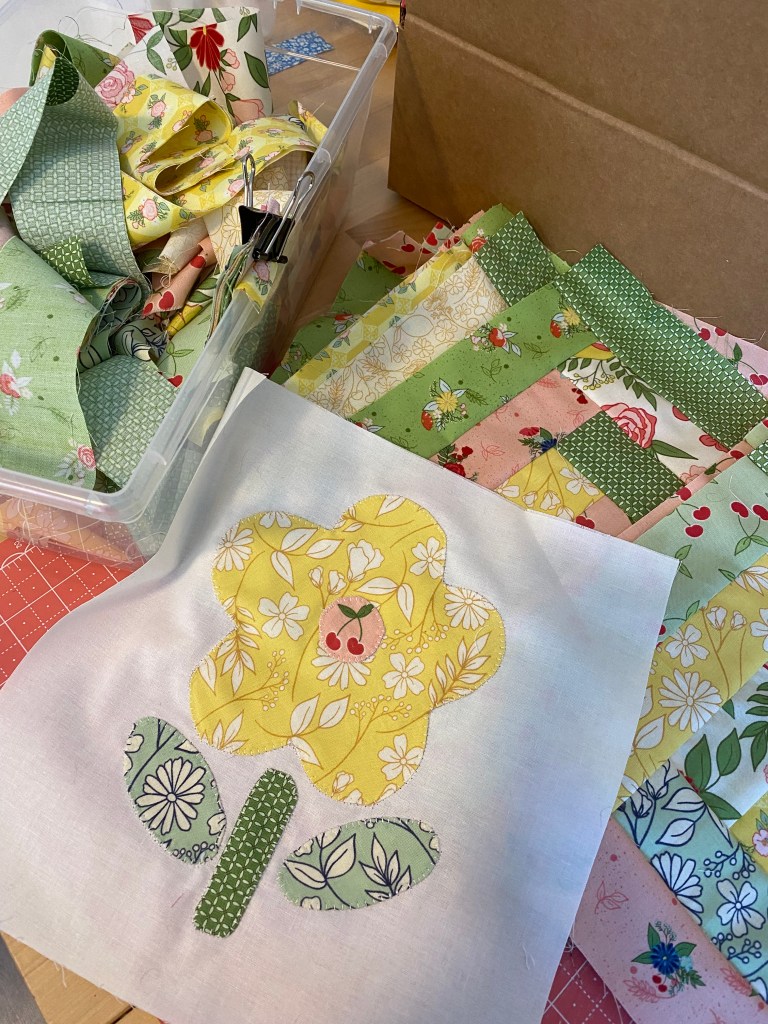
I LOVE this line, its call Reflections by Riley Blake. The prints are very vintage, florals and cherries, happy summer prints. I have tried a few things but didn’t love it, until I did a log cabin sample and now I’m hooked. I’m starting to think log cabin is my favorite block. This quilt will be a mix of log cabin and some applique.
For the applique I’m doing flowers from Cath Kidston’s Sew book.
I’m thinking the inner circles need to be bigger then this test block. Loving those cherries!
8 more applique blocks to go and I can get it all squared up.. woohoo. I really need to get some quilts on the pile quilted before starting anymore lol!
Shop Updates:
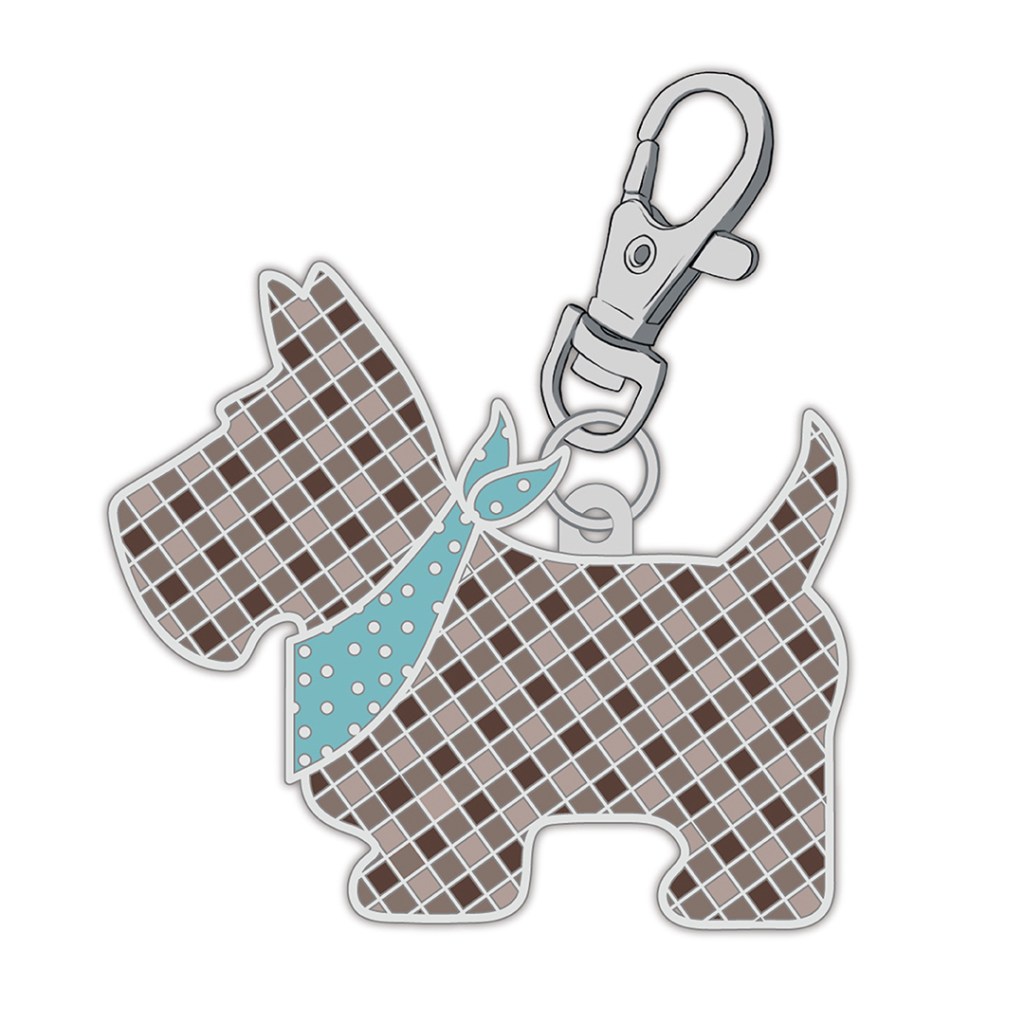
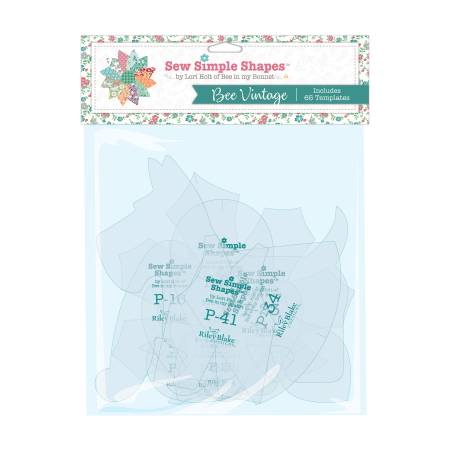
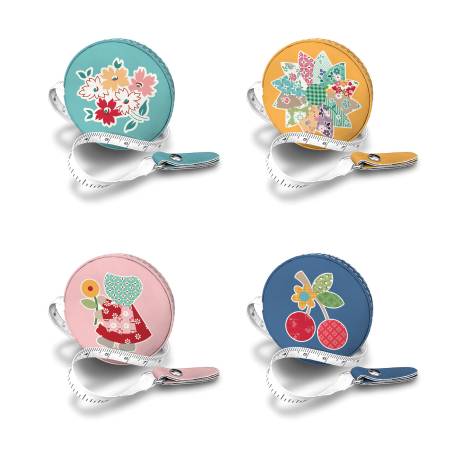
In yesterday stock delivery was some of the new Lori Holt line Bee Vintage. The sew simple shapes, charms and tape measures are in. Charms for this line are sunbonnet sue, scottie dog & a house. The measuring tapes are soooo sweet! Faux leather in 4 colours and designs. The sew simple shapes look fun! There is a tea pot!!! The Calico tin mug finally arrived, Sue Daley large rotating mat is back in stock as are black zipper tape.
Its going to be a nice sunny day with a high of 10c so I’m getting off this computer now and taking the pups for a walk before heading to the shop. Have a wonderful, creative day!