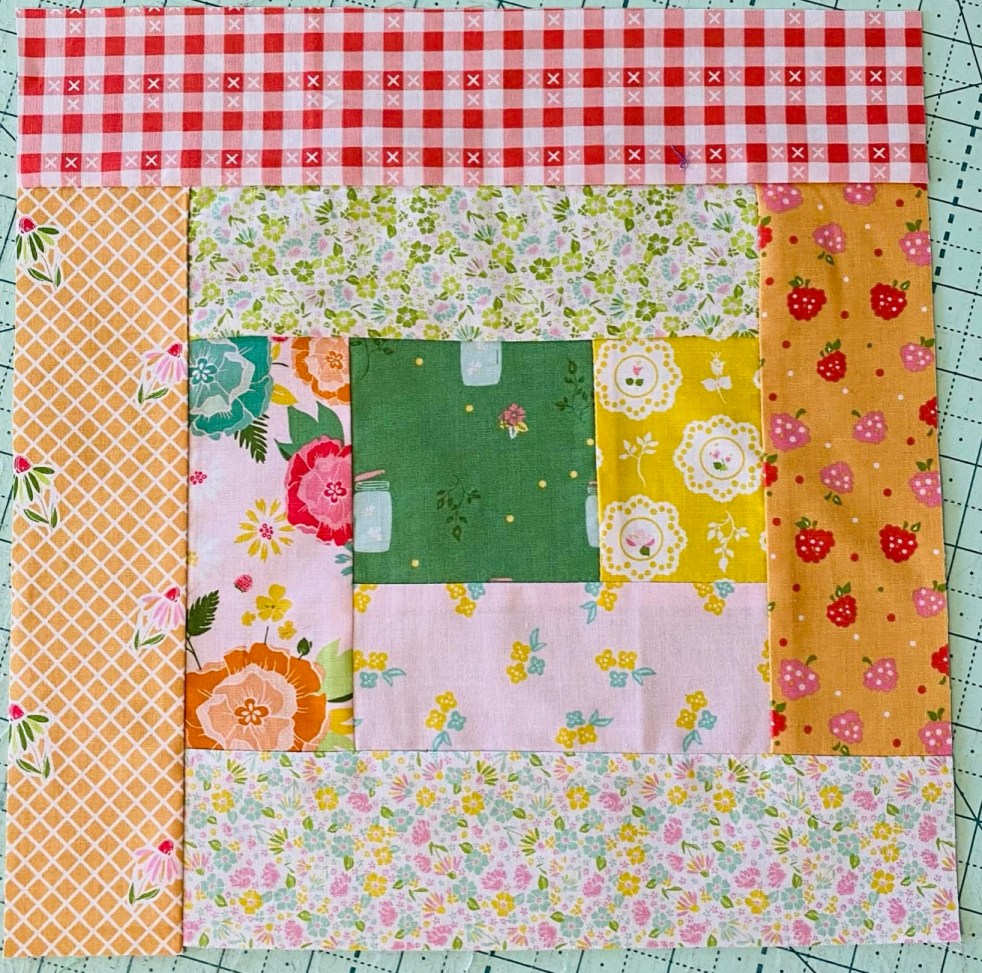
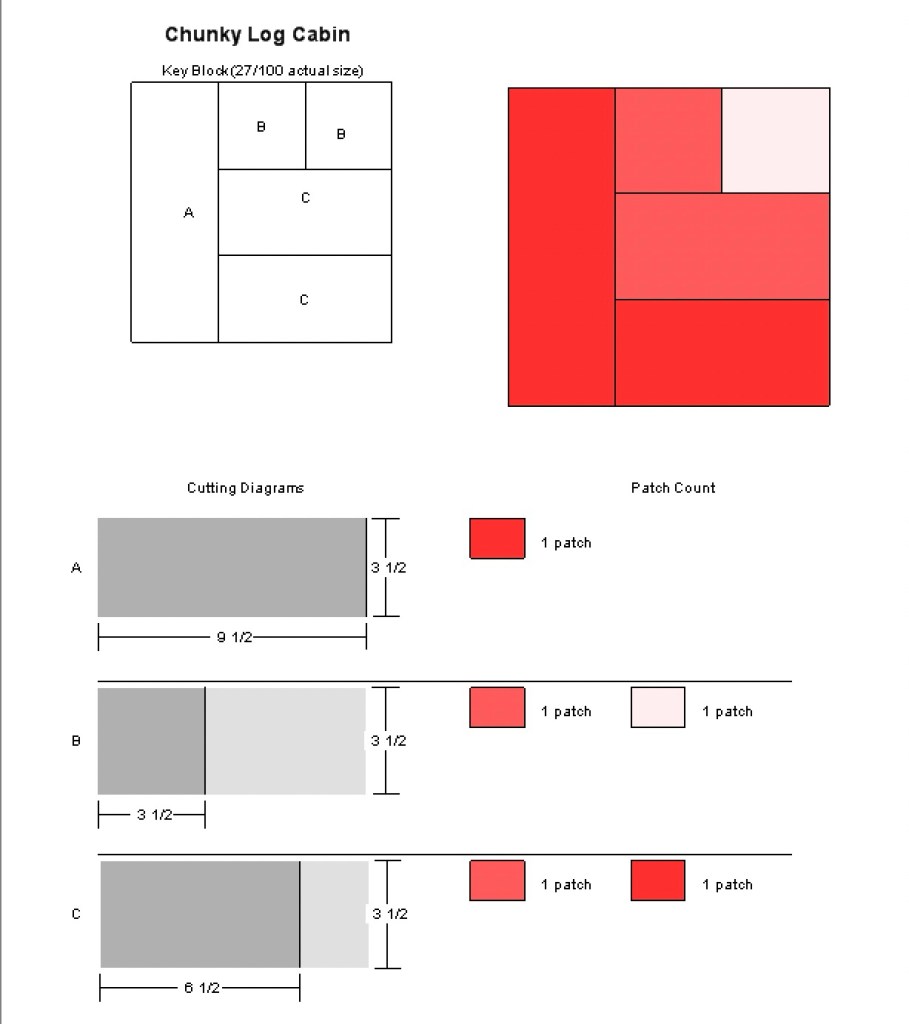
Log cabin blocks are very versatile and y to play with. They start with a centre and work around the centre with strips. You can start on the top, side or bottom, you can use the same width strips or strips of different widths. This one is a pretty standard.
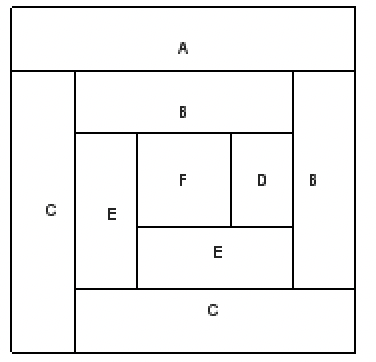
Before you ask why the letters for the strips are not in order, the program I use sets the letters, not me..
F: 3.5 inch square
D: 2.5 x 3.5 strip
E: 2.5 x 5.5 inch strip (need 2)
B: 2.5 x 7.5 inch strip (need 2)
C: 2.5 x 9.5 inch strip (need 2)
A: 2.5 x 11.5 inch strip
Sew D onto F
Sew E to the bottom
Sew E to the side
Sew B to the top
Sew B to the side
Sew C to the bottom
Sew C to the side
Sew A on the top
Finished.
You can keep going and make it bigger if you would like.
Make sure to iron after sewing each strip and use a 1/4 inch foot.
Have fun making these into quilts, pillows, pot holders etc.
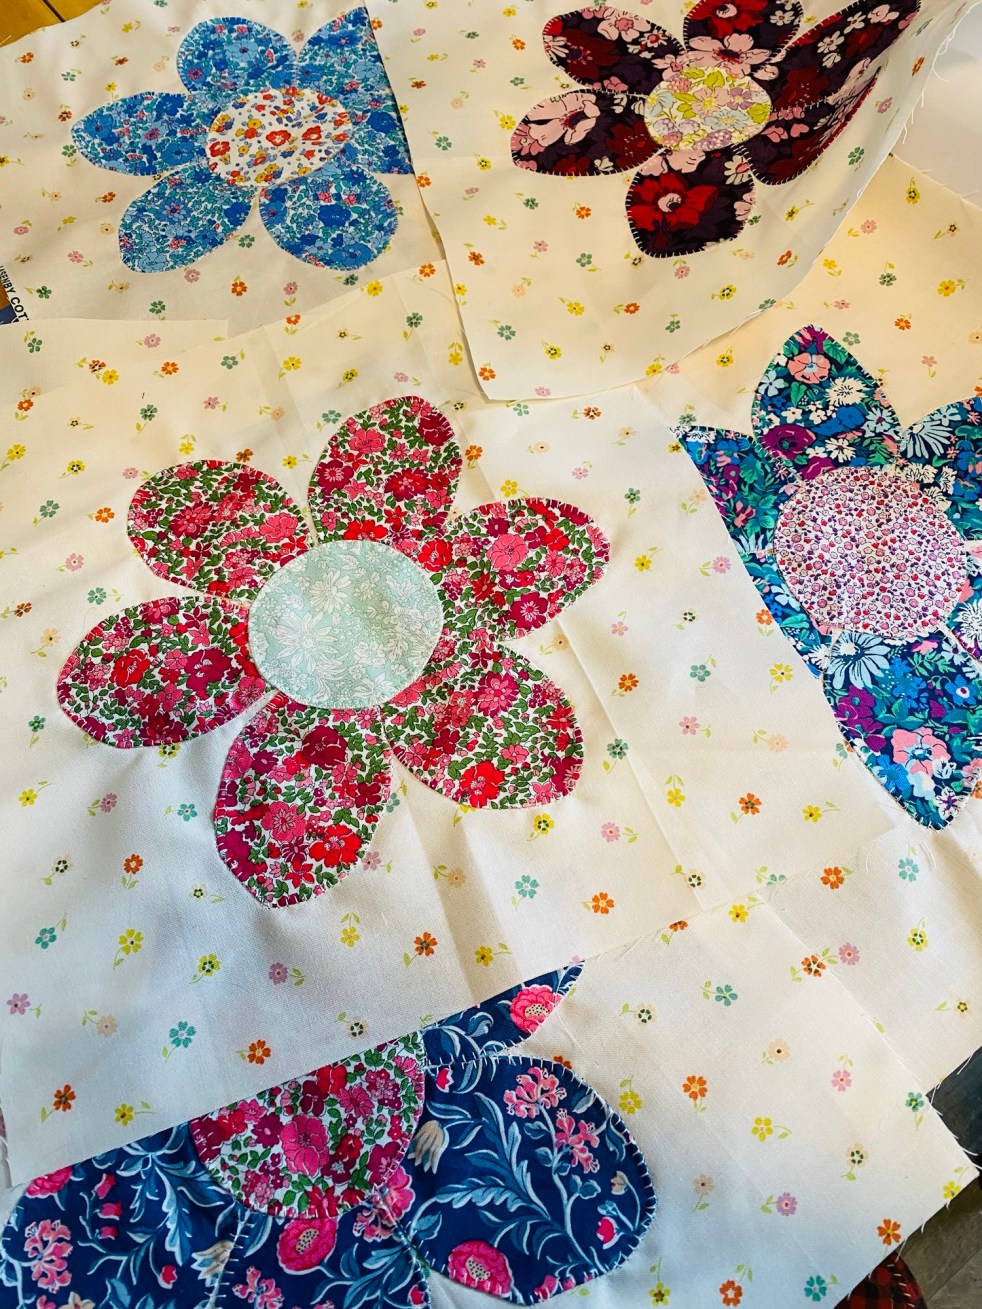
It’s been a super busy year, but we’re now in wind down mode, which means I can get to make some fun stuff. I sold out of all my appliqué quilts this year so that’s first priority.
I have a bin full of flower bits, I always seem to make flowers so no use fighting it. My templates are card stock cut into pedal and leaf shapes of all sizes. I made a large one last year that I love! It makes big happy flowers I often use on pillows, but couldn’t wait to use them on a quilt!
What will the quilt look like? No idea. Right now it’s 12.5 inch squares with big flowers
I’m using all Liberty, Work with what you love!
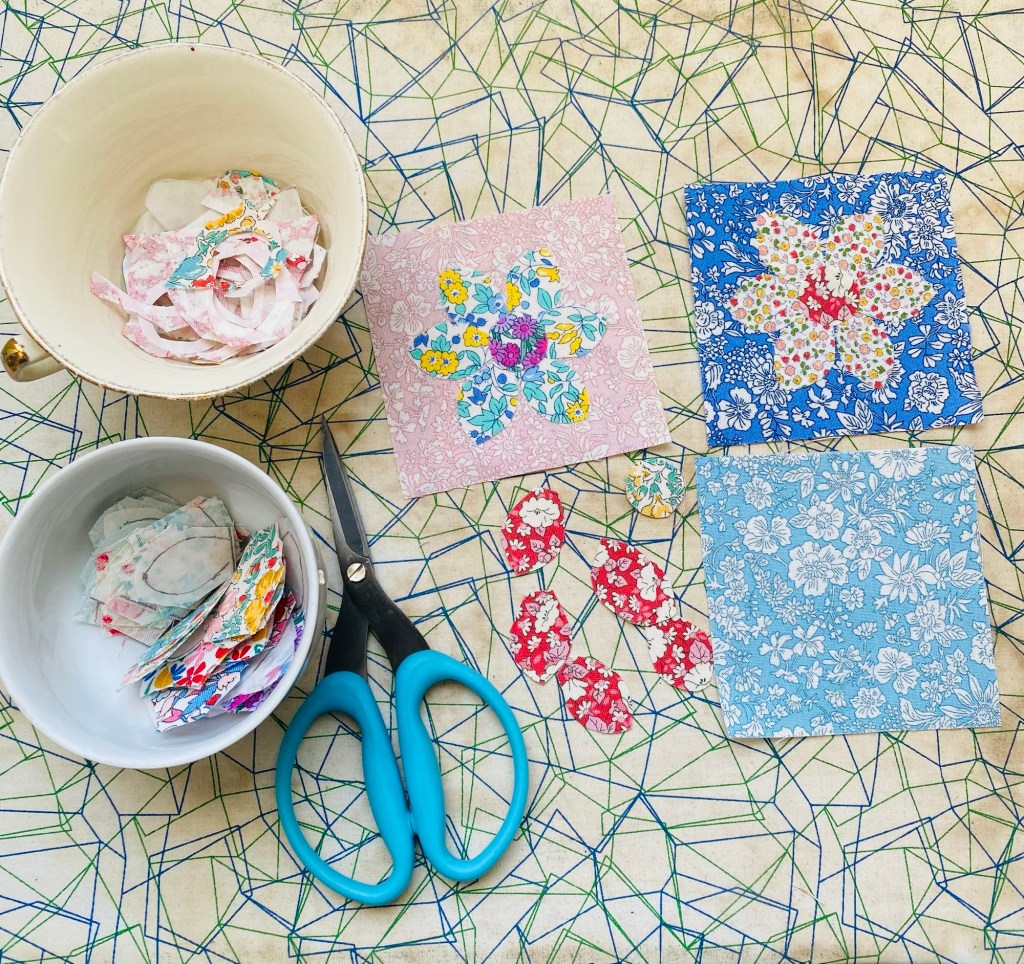
With the scraps from cutting out the flowers I’m making 3.5 inch squares with tiny flowers. I used the bondaweb method for those, too little to turn. I’m not a fan of this method as it looks so flat, But it uses up scraps. no plans for these square, just making them lol.
The huts still open until next Sunday, it’s sad when it closes for the winter.. hopefully that will change for next year.
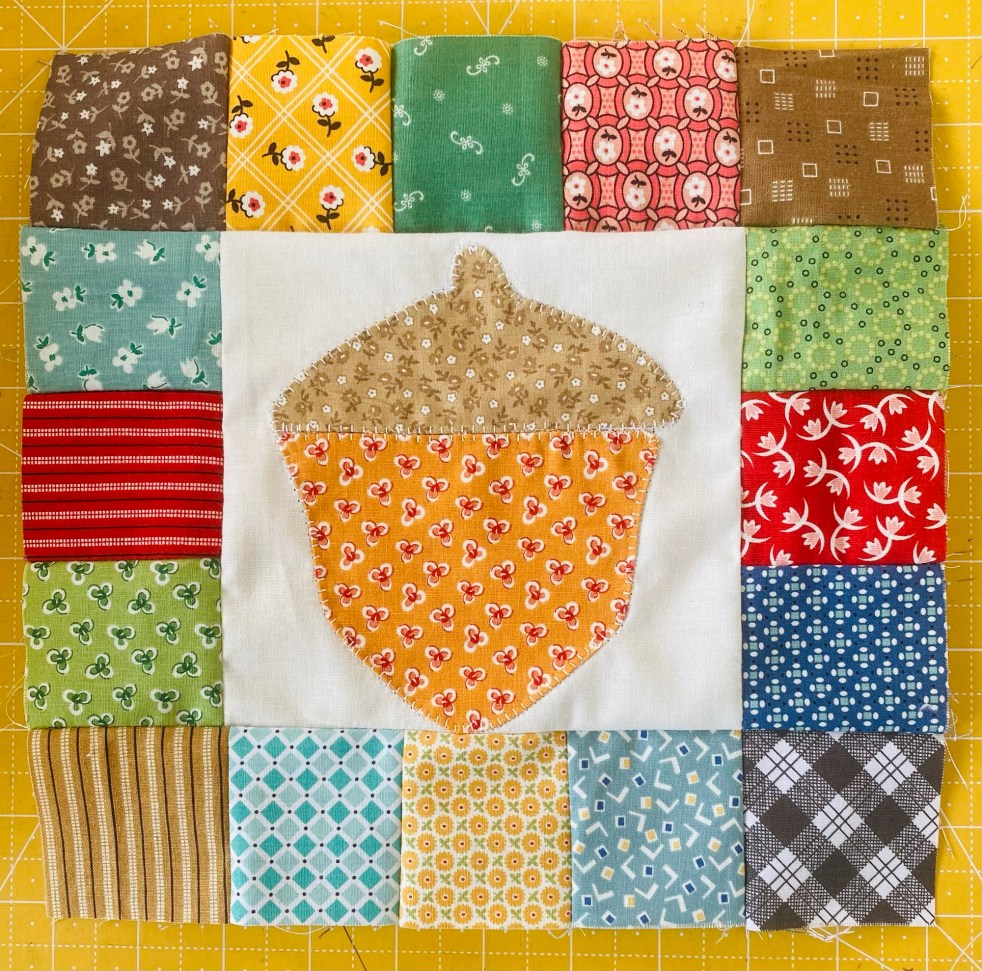
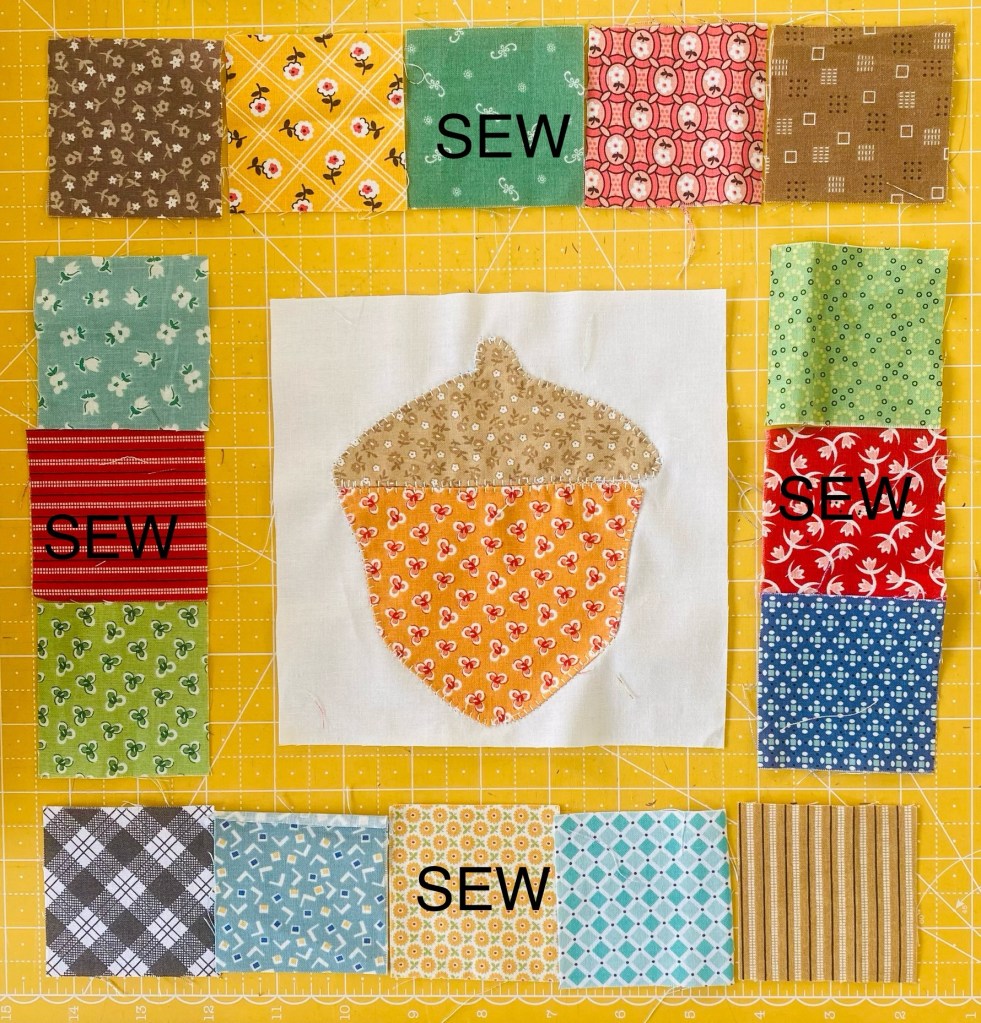
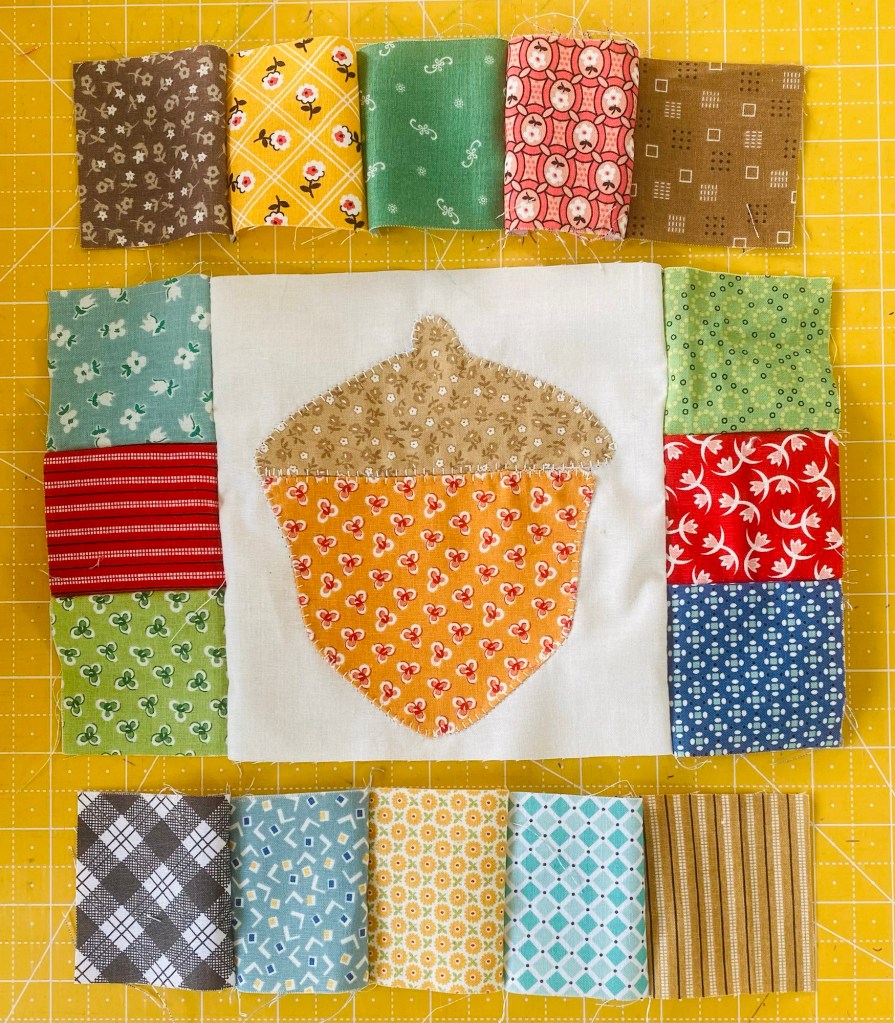
Here’s a super easy block perfect for scrappy projects. Can be used for pillows, runners, quilts, just adjust the measurements to suit your project. I will be making variations of this block on up coming projects
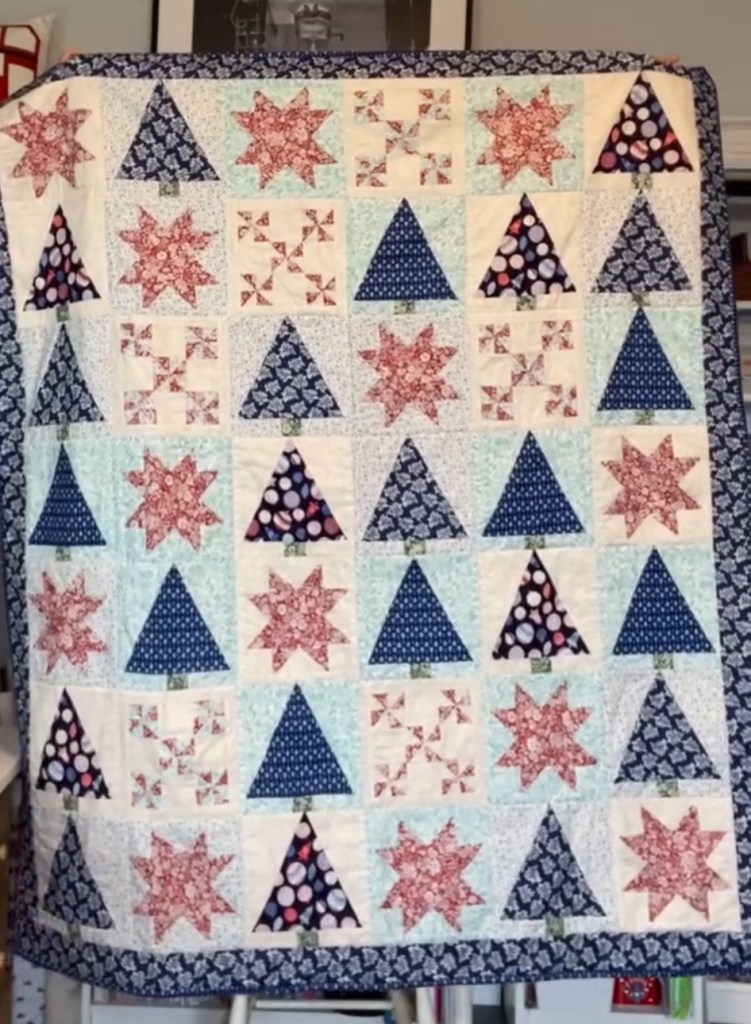
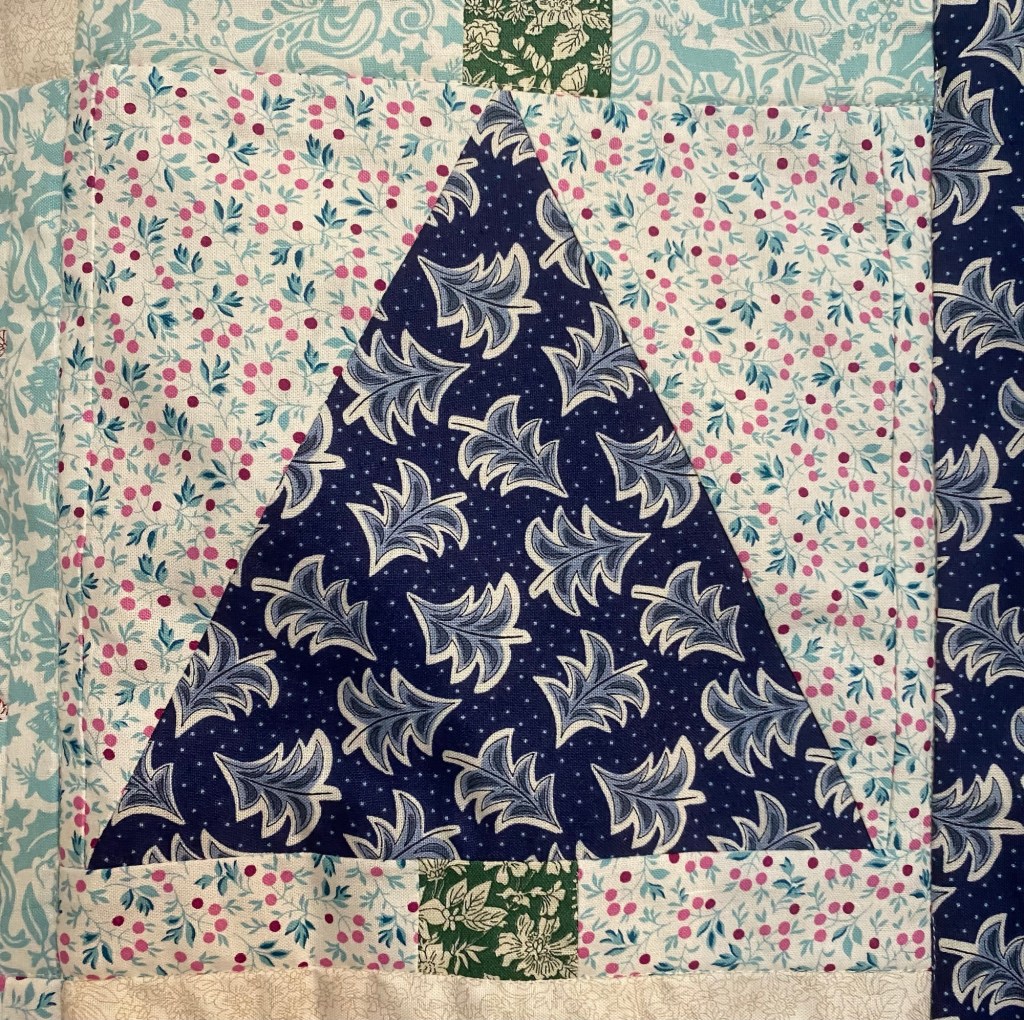
I have been wanting to play with my winter Liberty prints for a long time, but I couldn’t come up with design I liked. While going through the Liberty website for inspiration, I found some patterns! Free ones! This quilt is three blocks, the tree is from one quilt, the star is one from another and the last block is.. scraps from making the stars!
Here are the links to the free downloadable patterns:
Use the star block instructions. The pattern also has stars that are in a snowball that can also be used.
Scrap Snowflake Blocks:
Here is my YouTube video on how to sew scrap blocks when making flying geese for the stars:
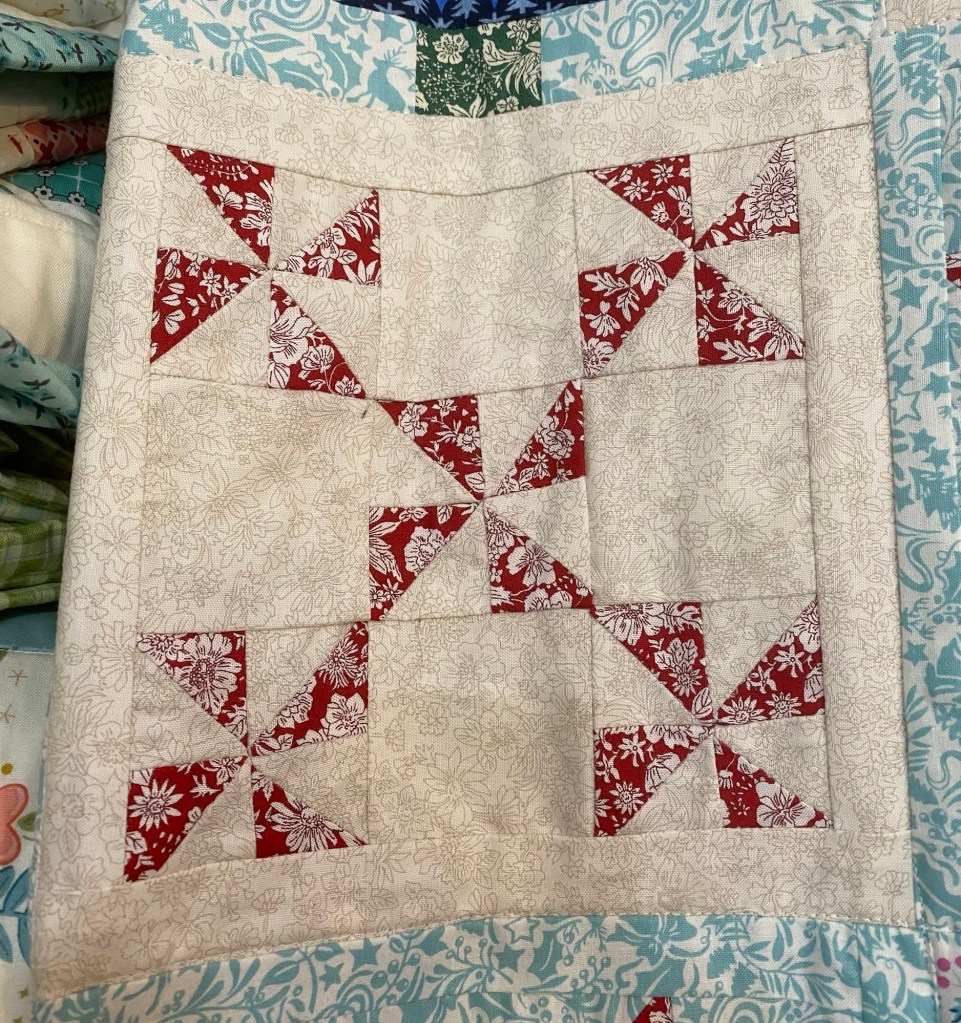
I made 6 star blocks and used the scraps to make these fun snowflake blocks. Make 30 pinwheel blocks from your star scraps. Trim to 3 inches. To make the block, sew a patchwork of 5 pinwheels and (4) 3 inch squares of a background print per block.
All blocks I added a 2 inch boarder around and ended up trimming to 8 inches. It would be 9 or 8.5 but I mess one one up and just went with 8 inch
I made 42 blocks all together. The layout can be any combo of the blocks as it’s a snowy forest kinda look, feel free to add in other 8 inch blocks.. it’s your quilt, have fun!
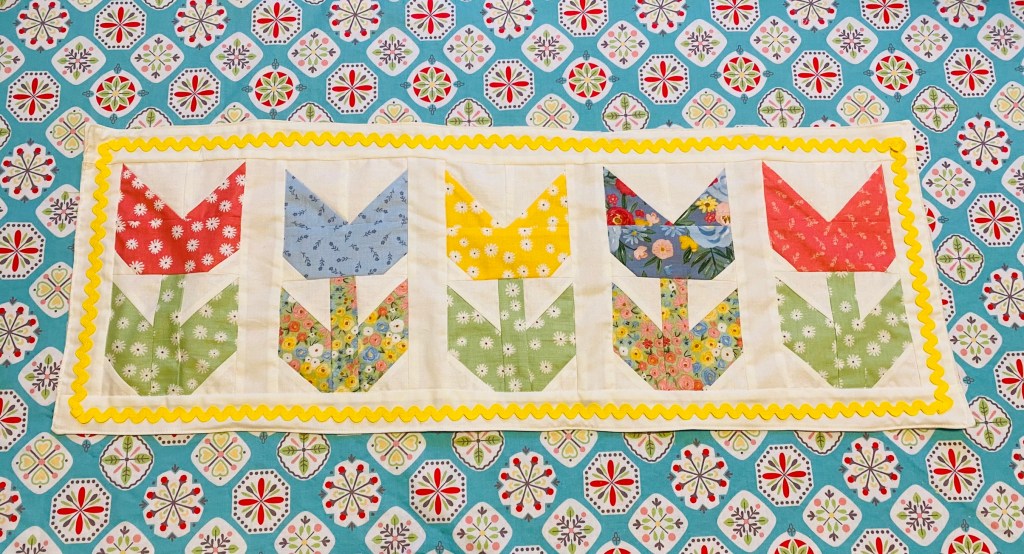
Its spring and spring means pretty flowers! Here is how to make a quick and easy runner.
Tulip Blocks: I made 5, you can make as many as you want. Material for each block:
Size: 5 inch x 9 inch
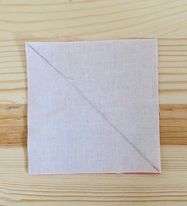
Background (white): (1) 3.5 inch (2) 1.5 inch squares (4) 2.5 inch squares Draw a diagonal line on all background squares.
Tulip: (1) 3.5 inch (1) 2.5 X 5 inch
Leaf (green): (2) 2.5 x 5 inch
Stem (green): (1) 1.5 x 5 inch
Sashing: (6) 2 inch x 9 inch Strips in background (I used off white). (2) Strips of 2 inch background as long as your finished runner for top and bottom boarders.
Backing: as big as your finished runner. I used less then 1/2 yard.
Place the 3.5 white square on top of the 3.5 inch tulip square. Sew 1/4 inch away from the diagonal line. Repeat on the other side of the line. Cut on the line to make 2 half square triangles.
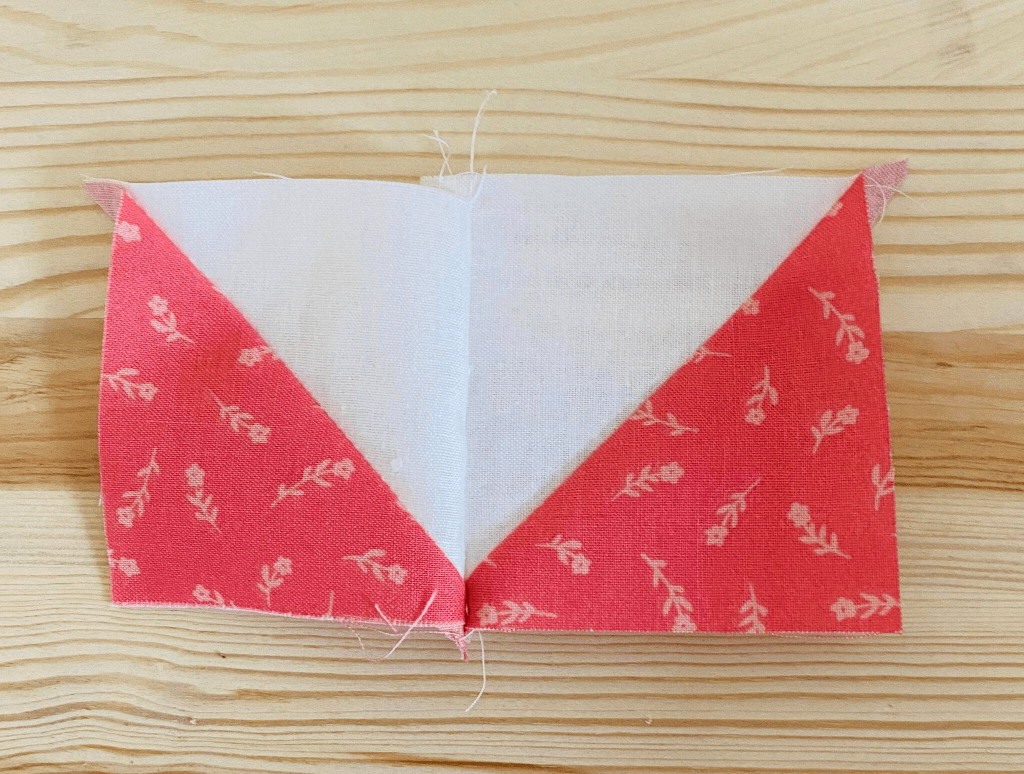
Place the two half square triangles side by side, make sure the bottom points are in line with each other, fold over top the other and sew the center seam.
The top of the tulip will look like this
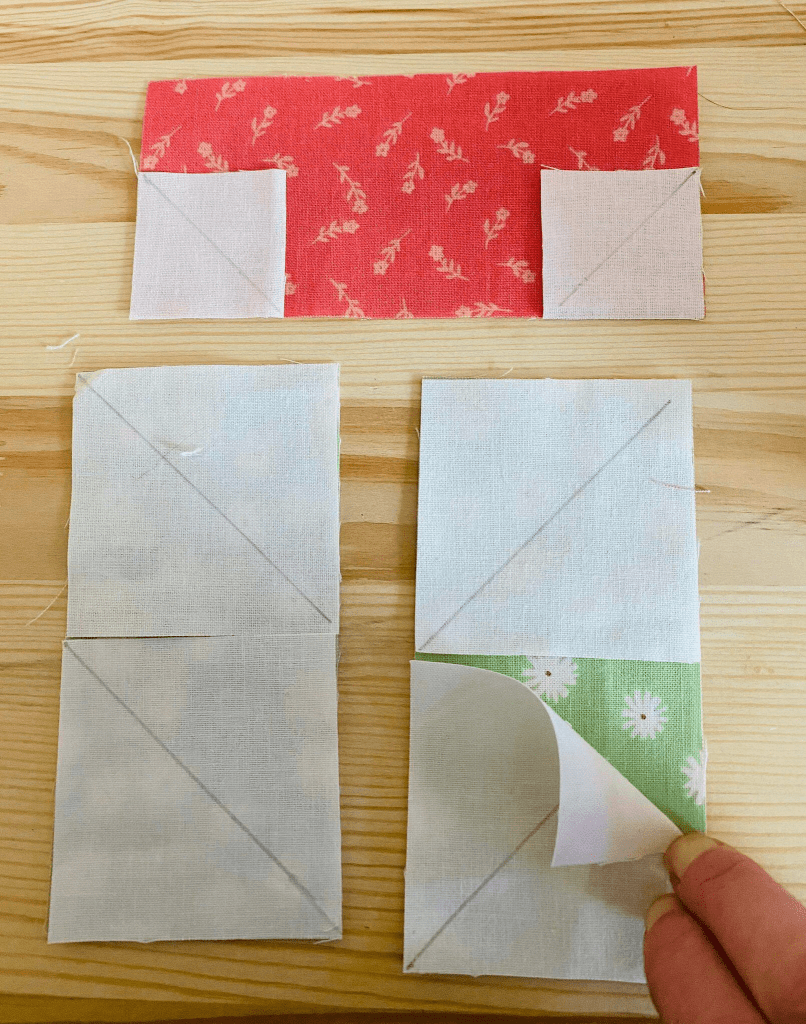
Place the 1.5 inch white squares on top of the bottom corners of the 2.5×5 inch tulip piece. Sew directly on the line. Cut 1/4 inch away from the sewn line and fold the corners back. Place the 2.5 inch white squares on the 2.5×5 inch leaf piece as shown. sew directly on the line, cut 1/4 inch away from the sewn line and fold back the corners.
Tulip top: Sew the two pieces together as shown. Leave/stem: Set up as shown and sew together. Last sew the top tulip flower to the bottom stem/leaf section. They may not match perfectly together, center the center of the tulip flower in the center of the stem, this will center it all. Sew the sections together Trim to 5 inch wide / 9 inch long.
Sew the 2×9 background strips in between each tulip and the ends. Sew the top and bottom strips on.
Place on backing with good side down, sew all the way around leaving a turning gap. Turn right sides out, iron, sew close to the edge all the way around. Add trim like ricrac if desired.
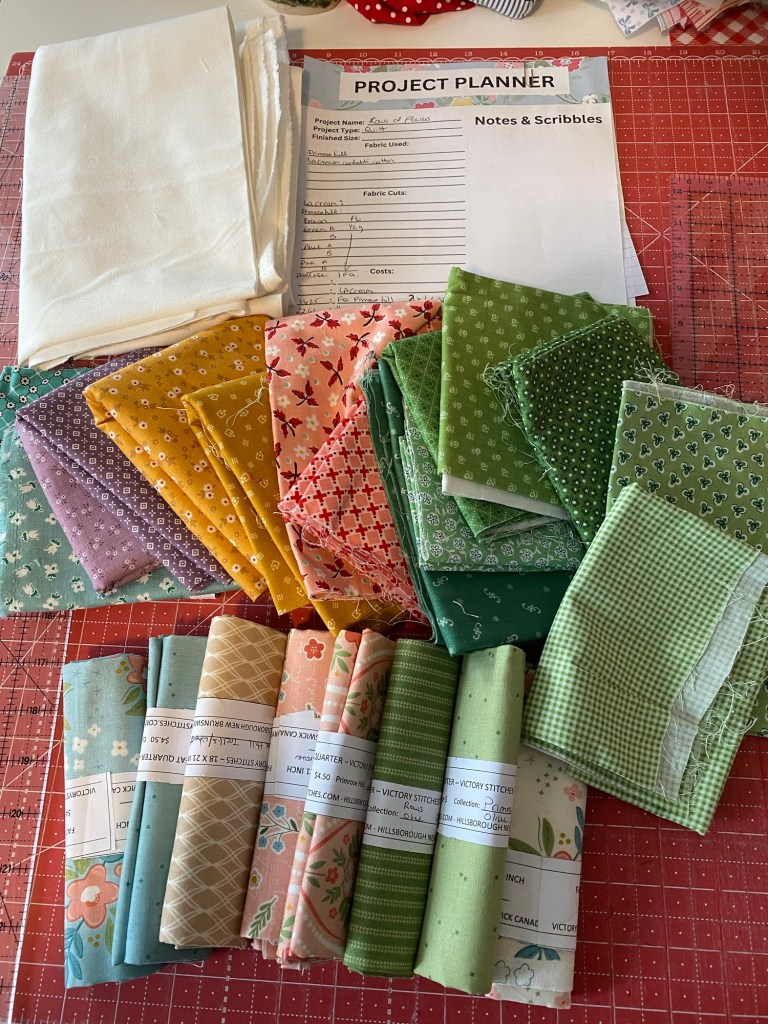
This is what designing looks like.. a mess lol. I started off wanting to use up some of the Primrose Hill fabric I have, that’s the bottom fat quarters in the picture. I made a flower block and found a leaf block I liked. I did all the calculations etc and started to iron so I could cut… then it hit me, can I make this from fat 8s so it’s more scrappy and cheaper to kit?
After another cup of tea, more calculations later I’m cutting two quilts today! The Lori Holt prints in that colourful pile will be cut to fat 8s then cut into the pieces needed to make sure my calculations are correct. I want to have more kits available this year in fun patterns that use a good amount of prints in an affordable package. Cross fingers this works out!